Studio One Setup and Troubleshooting: Panorama T Series
Important: Make sure that you install the Studio One integration files for Panorama T Series after installing Studio One. If you accidentally ran our installer before installing Studio One, Studio One will not recognize your T Series keyboard. In that case, simply run our latest Studio One support installers again. You can find the latest installers on your Account page.
Installation for Studio One 4 and above
- Download the ‘Panorama_T4T6_StudioOne_Support’ file from your Account page after registering your product. If you selected Studio One as your DAW, you’ll find the link below your product registration.
- Run the ‘Panorama_T4T6_StudioOne_Support’ installer and follow the onscreen instructions.
- Now launch Studio One.
- From the Studio One menu navigate to ‘Preferences’ (in MacOS) or ‘Options’ (in Windows) and select ‘External Devices’ (Image 1).
- If your ‘External Devices’ window already shows two Panorama T-series devices (Image 1) you are ready to go. Move on to step 8.
- However if you see only one or no devices you will need to click the ‘Add…’ button to add them manually.
- Choose the missing ‘Panorama T-Serires’ and/or ‘Panorama T-Series Keyboard’ from the Nektar folder (Images 2 and 3) and click ‘OK’.
- Make sure the ‘Receive From’ & ‘Send To’ ports are set up according to the table below. (Image 1).
MacOS Send To Receive From Panorama T-Series Panorama T* Instrument Panorama T* Instrument Panorama T-Series Keyboard Panorama T* Internal Panorama T* Internal Windows Send To Receive From Panorama T-Series MIDIOUT2(Panorama T*) MIDIIN2(Panorama T*) Panorama T-Series Keyboard Panorama T* Panorama T* Note: ‘Panorama T*’ where * represents the T4 or T6 keyboard model you are using.
- Click ‘OK’ to close the ‘Preferences’ window.
- Create a new project or open an existing one.
- Press the play button on the controller to confirm that it is communicating with Studio One.
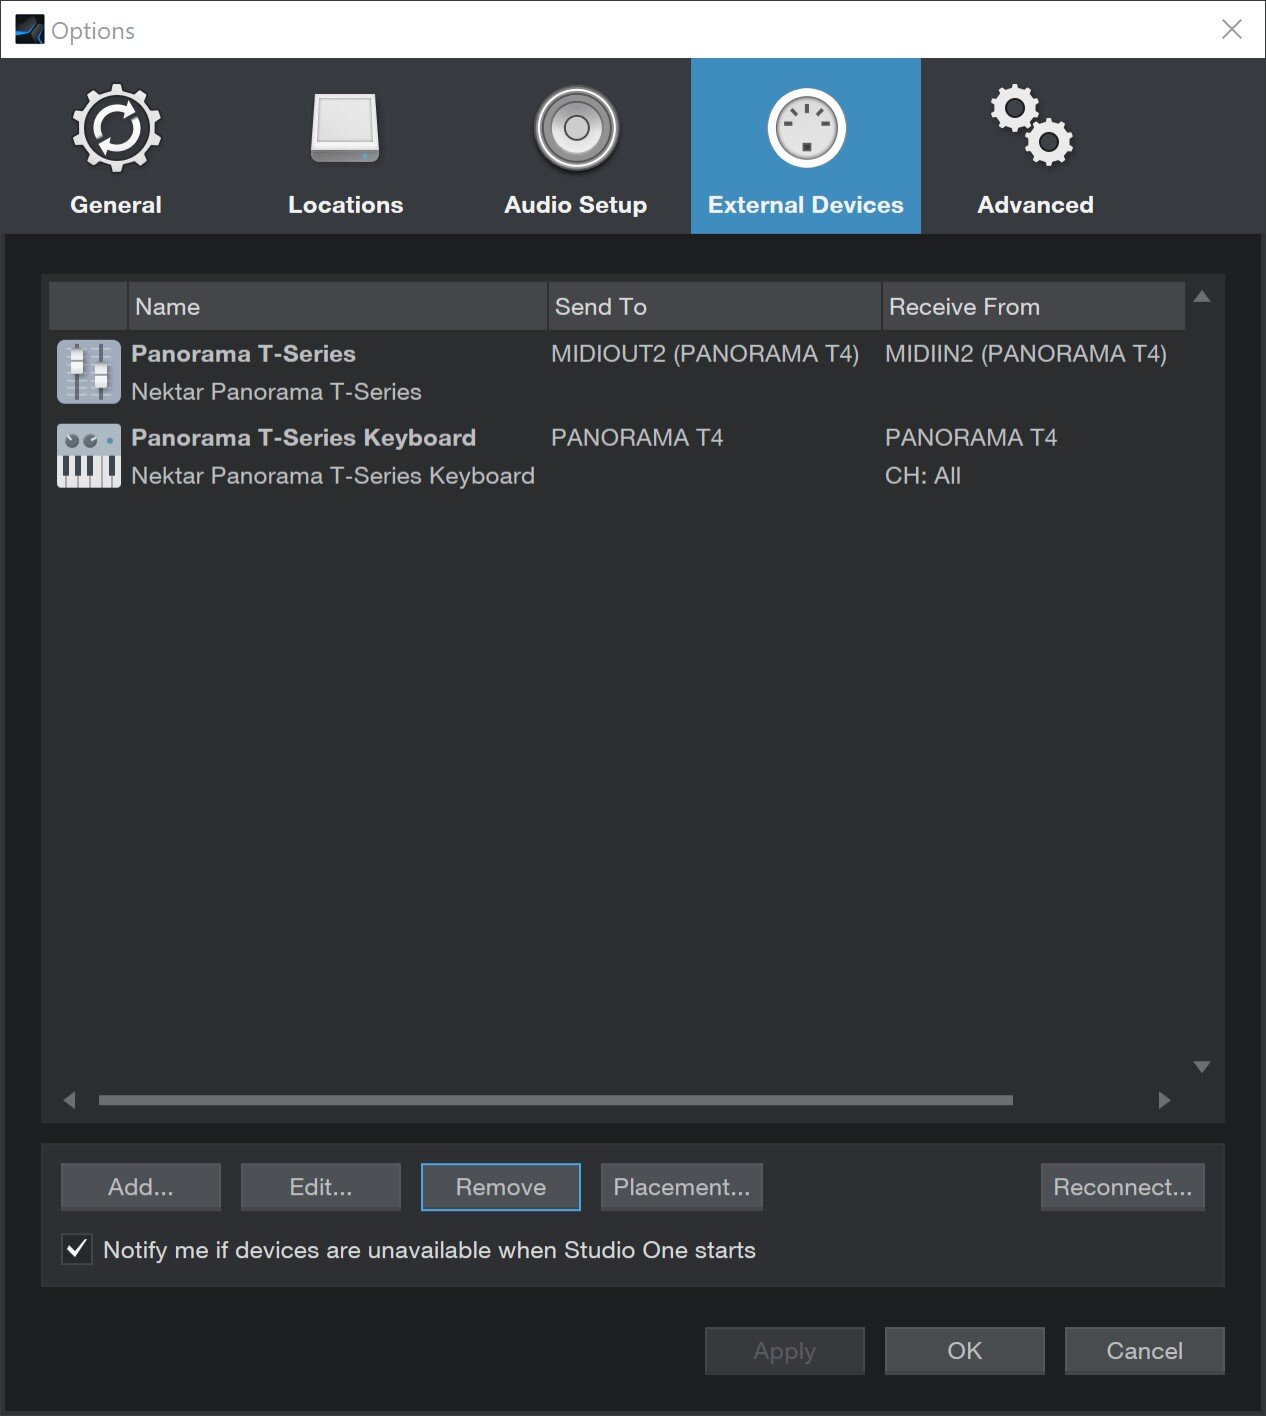
Image 1

Image 2
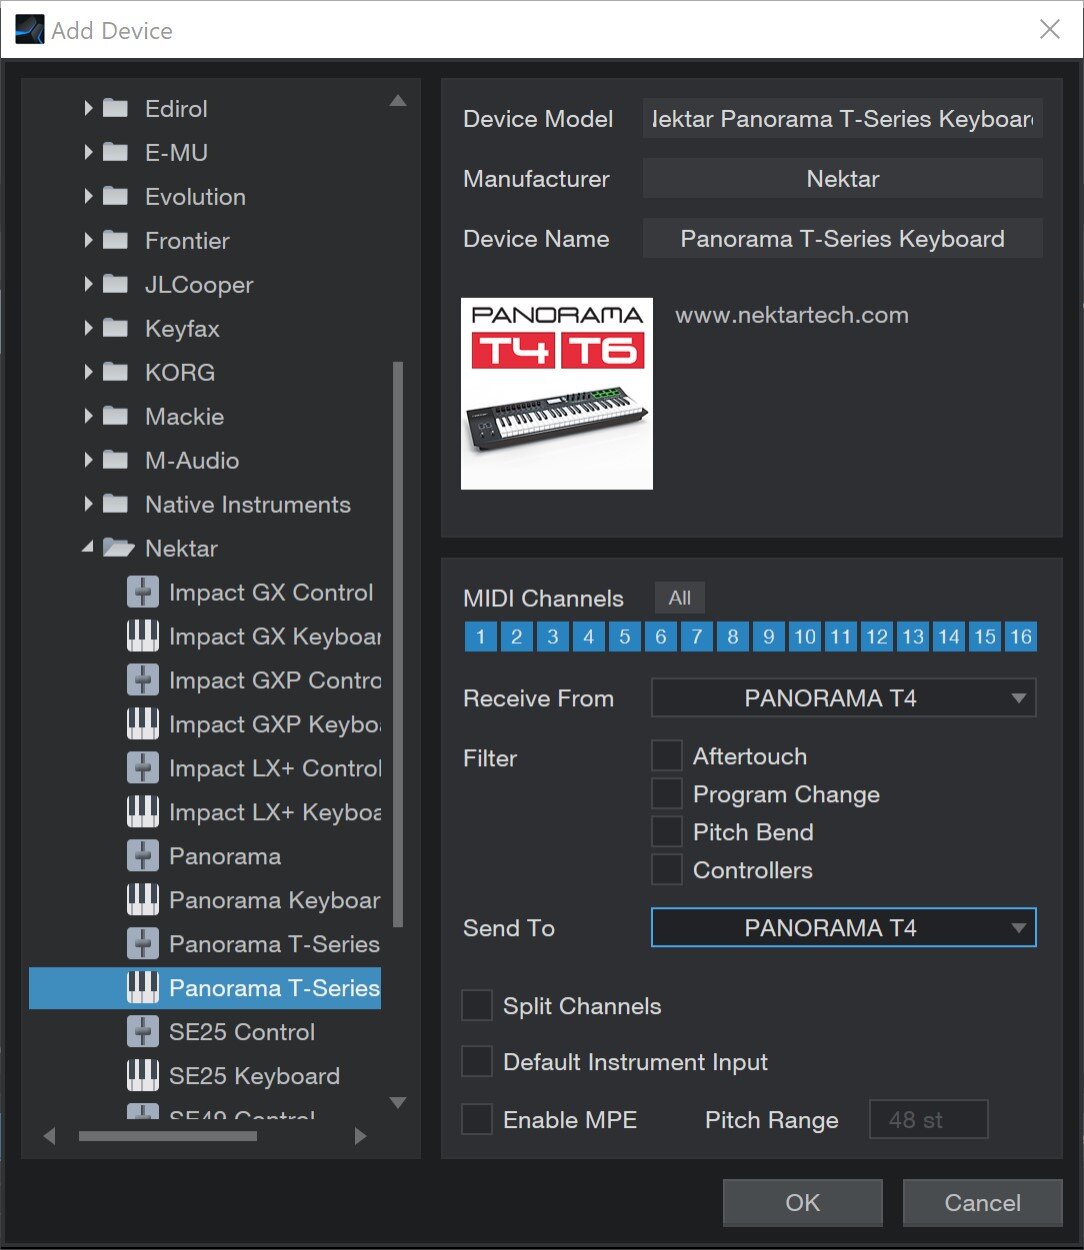
Image 3
Troubleshooting
Studio One 5.1 and above
If you have already started Studio One 5.1, with an older version of our Presonus Support and encountered an error message or crash, please run the latest installer from your account page, then navigate to the External Devices menu in Studio One and remove any External Device configurations for Nektar devices. After clicking the ‘Remove’ button, click ‘No’, so that the controllers files are not deleted. Then restart Studio One, so that the controller can be detected as if it were the first time.
If you were using your controller with Studio One 5.0.2 or earlier, please remove the devices from the ‘External Devices’ menu in Studio One, before installing the latest update.
If you cannot control Studio One’s included instruments or you are unable to use the Control Link system to assign controls from Instrument Mode, make sure that the ‘Panorama T-Series’ device is in focus. Every plug-in window has a drop down menu, in the upper-right corner, which allows you to select which controller is currently in focus. (See image 4)
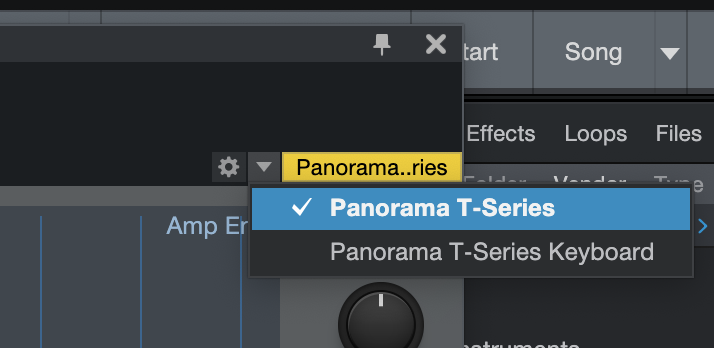
Image 4
- If you see your controllers in the External Devices window but transport and other control surface functions are not working, please, remove the device configurations from the ‘External Devices’ menu and reinstall the Studio One support files.
- If you have manually removed your Impact controllers you will need to reinstall the Studio One support files in order to use them in Studio One again.