Using Harrison Mixbus or Ardour with Impact
Impact LX, LX+, and GX controllers can be used as a simple control surface in Harrison Mixbus and Ardour with some basic configuration. To get started, please download the Control Surface Script file from the link below.
Installation & Setup
Please first download this file:
Note: Only Ardour 5 and Mixbus 32C above are supported.
Place the downloaded file in the following directory for Ardour:
- Windows: C:\Program Files\Ardour<version number>\share\ardour<version number>\midi_maps (Image 1)
- OSX: //Applications/Ardour<version number>/Contents/Resources/midi_maps (Image 2)
Note: Right-Click on the Ardour application, select ‘show package contents’.
Place the downloaded file in the following directory for Harrison Mixbus:
- Windows: C:\Program Files\Mixbus32C-<version number>\share\ardour5\midi_maps (Image 3)
- OSX: //Applications/Mixbus32C-<version number>/Contents/Resources/midi_maps (Image 4)
Note: Right-Click on the Mixbus application, select ‘show package contents’.
Ardour/Mixbus Installation:
- Connect your Impact LX/+ or GX controller to your computer.
- Start Ardour or Mixbus.
- In Windows, open the ‘Edit’ menu.
- In OSX, open the ‘Mixbus32C-<version number>’ menu or the ‘Ardour<version number>’ menu.
- Select ‘Preferences’.
- Select ‘Control Surfaces’.
- Highlight ‘Generic MIDI’ and check the ‘Enable’ box. (Image 5 Windows, Image 6 OS X)
- Double click on ‘Generic MIDI’. (Image 7 Windows, Image 8 OS X)
- Set Incoming MIDI to: ‘Impact ****.
- Set Outgoing MIDI to: ‘Impact ****.
- Set MIDI Binding to ‘Nektar Impact LX’ or ‘Nektar Impact GX’.
- Note: Smoothing setting helps prevent fader and knob glitching. Set to above 15.
Note: ‘Impact ****’ where **** is the full model designator, e.g.; ‘Impact LX49+’ or ‘Impact GX61’.
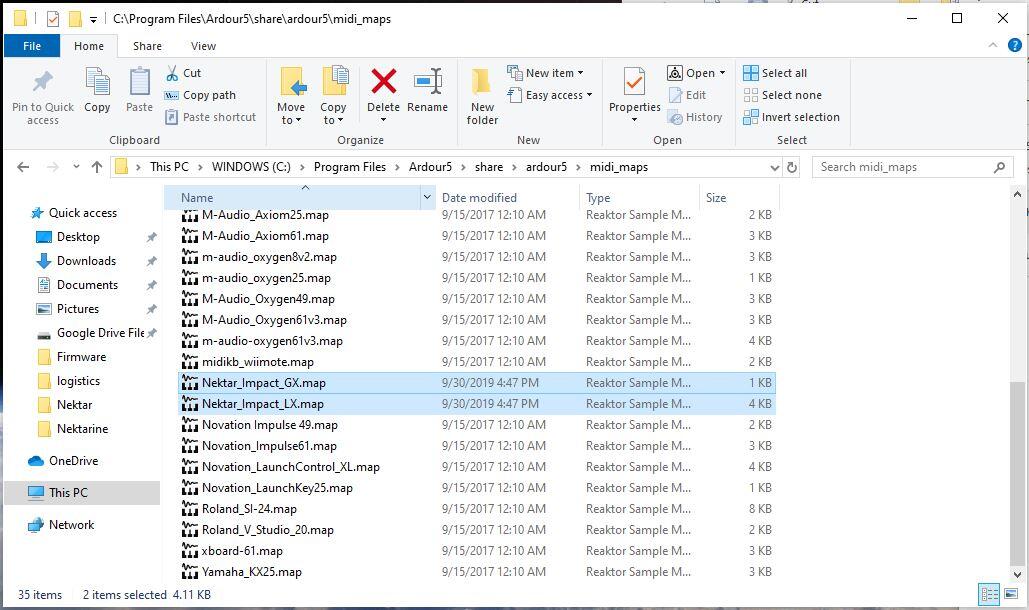
Image 1) Windows
Image 1) Windows
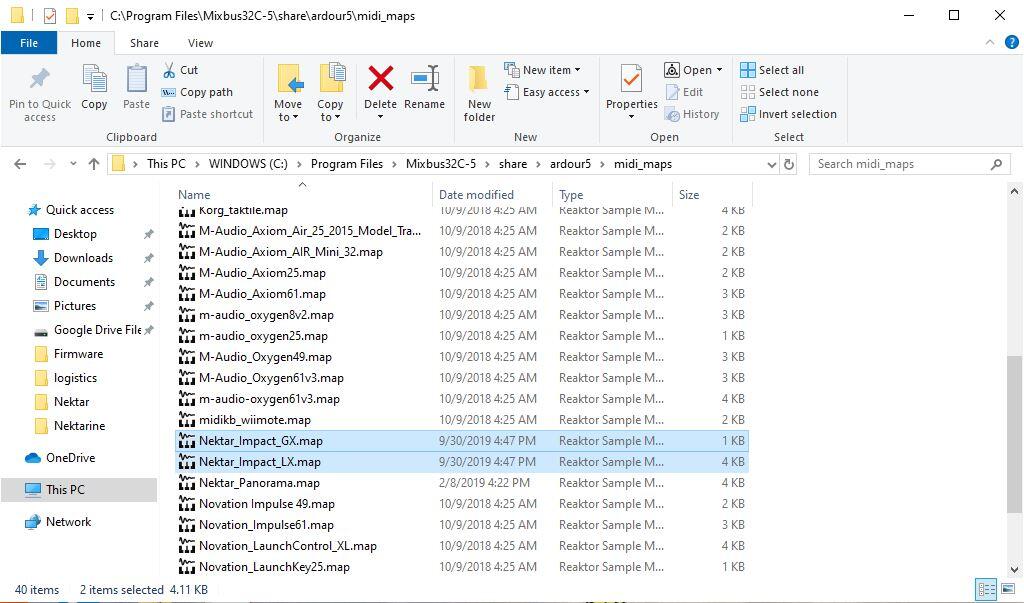
Image 3) Windows
Image 3) Windows
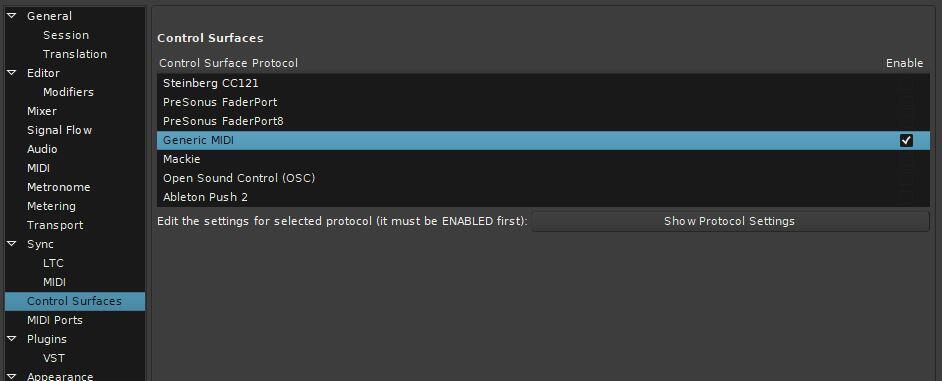
Image 5) Windows
Image 5) Windows
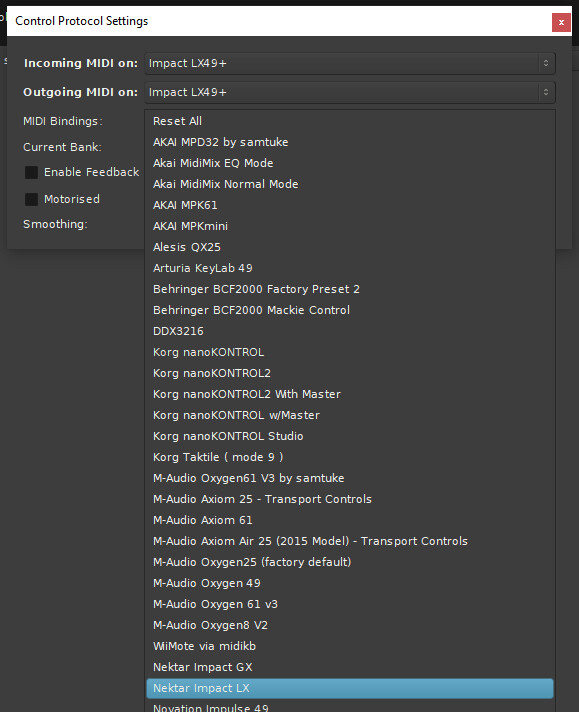
Image 7) Windows
Image 7) Windows
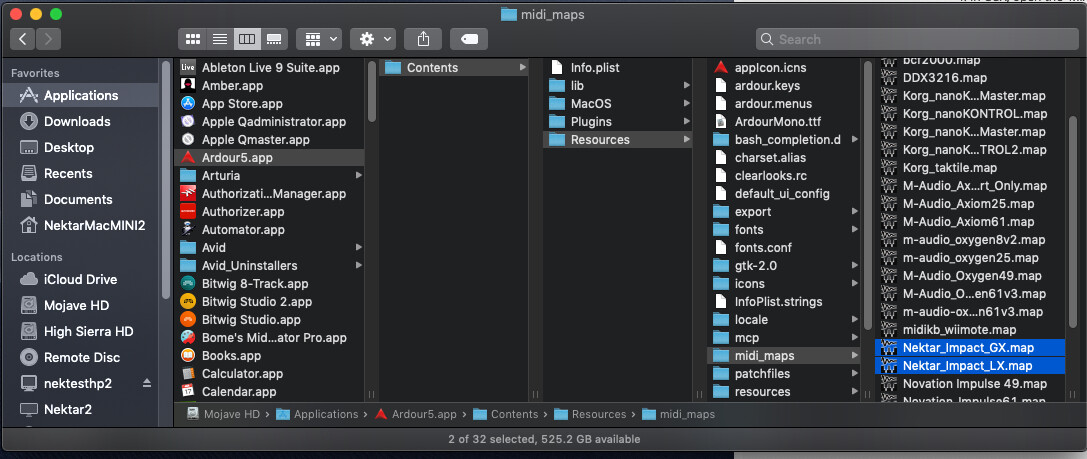
Image 2) OS X
Image 2) OS X

Image 4) OS X
Image 4) OS X
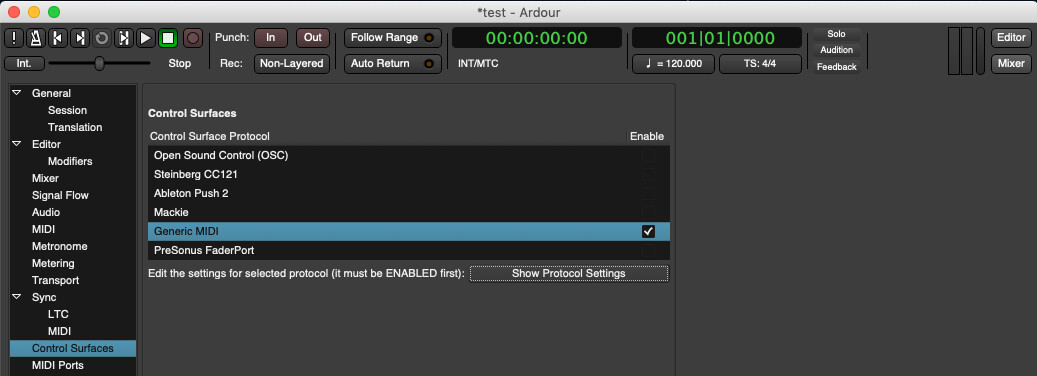
Image 6) OS X
Image 6) OS X
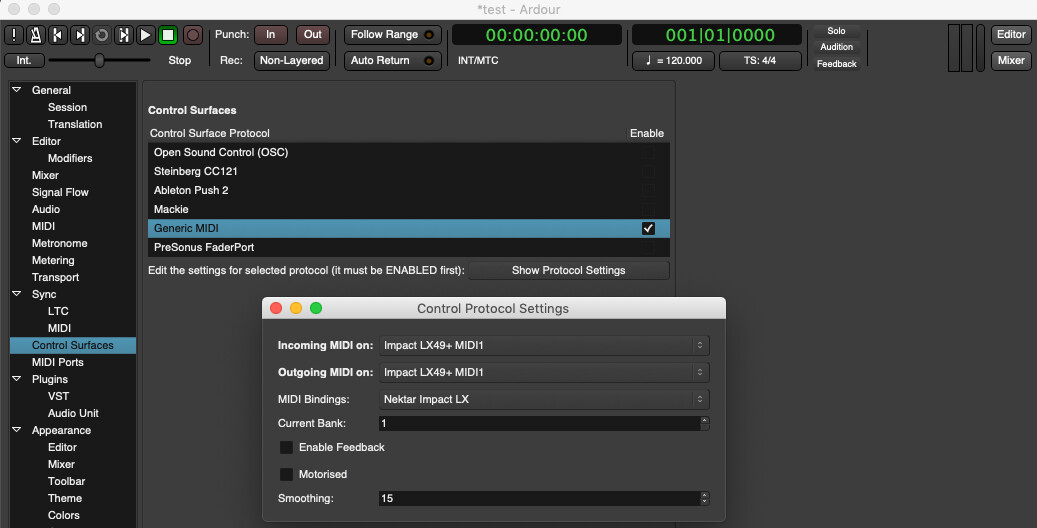
Image 8) OS X
Image 8) OS X
Now make sure that the USB Port Setup mode for the Impact controller is set to 0. Please follow these steps for Impact LX/LX+:
- Hold ‘Shift/Mute’ and press ‘Patch > (Setup)’. The display will say ‘S.E.t.’.
- Press key ‘A2’ (this is the 13th white key from the left on 25, 49 and 61 key controllers, 22nd white key on 88 key controllers).
- Press key ‘C3’ (labeled with a ‘-‘) until the display says 0.0.0. (on the LX25+, press ‘C3’ (Enter) then press ‘C1’ (-) until the display says ‘0.0.0.’).
- Hold ‘Shift/Mute’ and press ‘Patch > (Setup)’ to exit Setup mode.
Please follow these steps for Impact GX:
- Press ‘Setup’. The setup button will illuminate.
- Press key ‘A2’ (labeled ‘USB Port Setup’).
- Press key ‘G3’ on GX49 or ‘G4’ on GX61 (labeled with a ‘0’).
- Press key ‘C5’ (GX49) or ‘C6’ (GX61) (labeled ‘Enter’).
Features
Transport Buttons:
| Button | Function |
|---|---|
| Cycle | Activate/Deactivate loop markers in Sequencer |
| << (Rewind) | Moves playback position backward |
| >> (Fast Forward) | Moves playback position forward |
| Stop | Stops play back |
| Play | Starts play back |
| Record | Activates Recording |
< Track & Track > Buttons:
- Moves the selected bank by 8 tracks at a time
Mixer Mode (press the Mixer button)
Faders:
- Faders 1-8 control volume for the selected bank of 8 channels.
- Fader 9 controls the Master Volume.
Fader Buttons:
- Buttons 1-8 Mute the selected bank of 8 channels.
Knobs:
- Control Pan for the selected bank of 8 channels.
Instrument Mode (press the Inst button)
Knobs:
- Control the first 8 parameters for the selected plug-in.