Using Ableton Live with Impact
Impact LX, LX+ and GX keyboards can be used as a simple control surface in Ableton Live with some basic configuration. This template is not as comprehensive as our integration for the other DAWs which we support but it will give you a place to start, so that you don’t need to configure basic functions, such as Transport control.
Installation & Setup
To get started, please download the Live Remote Script below:
Note: Only Live 8.3 and above are supported.
- With Ableton Live closed copy the ‘Impact LX’ folder to the following location:
- Windows: C:\Users\<your user name>\AppData\Roaming\Ableton\Live<version number>\Preferences\User Remote Scripts (Image 1)
Note: This is a hidden directory. To access this directory you will need to configure Windows to ‘Show Hidden Files and Folders’ and deactivate ‘Hide Protected Operating System files’. Please follow the instructions on this page: Show hidden files. - Mac OS X: ~/Library/Preference/Ableton/Live<version number>/User Remote Scripts (Image 2)
Note: in OSX 10.7 and above, this is a hidden directory. To access this directory follow these steps:- Open a Finder window.
- Open the ‘Go” menu, and press ‘Option’.
- Select ‘Library’.
- Open the ‘Preferences’ folder.
- Open the ‘Ableton’ folder.
- Open the folder for the most recent version of Live.
- Open the ‘User Remote Scripts’ folder.
- Windows: C:\Users\<your user name>\AppData\Roaming\Ableton\Live<version number>\Preferences\User Remote Scripts (Image 1)
- Once you have copied the Impact LX folder to the correct directory, launch Ableton Live and do the following:
- Open the ‘Preferences’ window in Live and select the ‘Link MIDI’ tab.
- Select ‘Impact LX’ (slot 1) from the list of Control Surfaces and set the Input port to ‘Impact LX**’ on Windows and ‘Impact LX** (MIDI1) on OS X.
- Repeat this for control surface slot 2 but for the input choose ‘Impact LX** (Port 2)’ for Windows and ‘Impact LX** (MIDI2)’ on OS X.
- Once you’ve competed the above steps your preferences window in Ableton Live should look like Image 3 (Windows) or Image 4 (OS X).
- Finally we need to make a quick adjustment on your Impact LX controller. Follow these steps to set the Global MIDI Channel to 16:
Impact LX/LX+
- Press ‘Shift/Mute’ + ‘Patch > (Setup)’ on the LX+ series (press the ‘Setup’ button on the original Impact LX).
- Press key ‘C2’ (Global Channel) on Impact LX’s keyboard. This is the second C key from the far left.
- If you are using an LX25/LX25+, press key ‘C3’ (labeled ‘Enter’). If you are using any other Impact controller, skip this step.
- Press Key ‘C3’ (labeled with a ‘-‘ sign, key ‘C1’ on the LX25) so the display says 0.1.6.
- Press ‘Shift/Mute’ + ‘Patch > (Setup)’ on the LX+ series to exit setup mode (again, press ‘Setup’ for the original LX).
Impact GX
- Press the ‘Setup’ button.
- Press key ‘A2’ (labeled ‘USB Port Setup’).
- Press key ‘B3’ for GX49 or ‘B4’ for GX61 (labeled ‘2’).
- Press key ‘C5’ for GX49 or ‘C6’ for GX61 (labeled ‘Enter’).
Now you are ready to Control Live from your Impact LX, LX+ or GX keyboard.
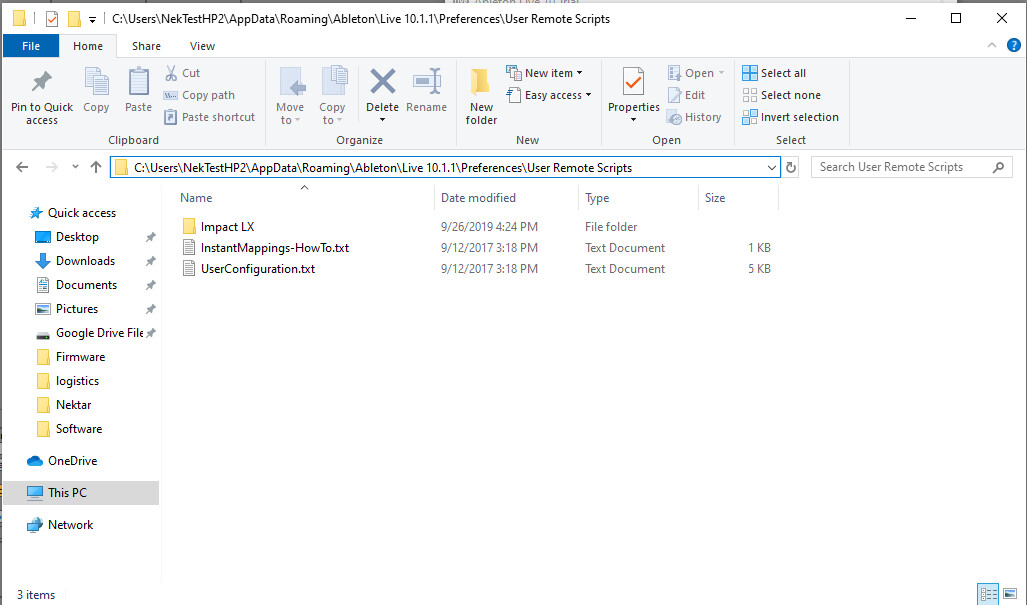
Image 1) Windows
Image 1) Windows
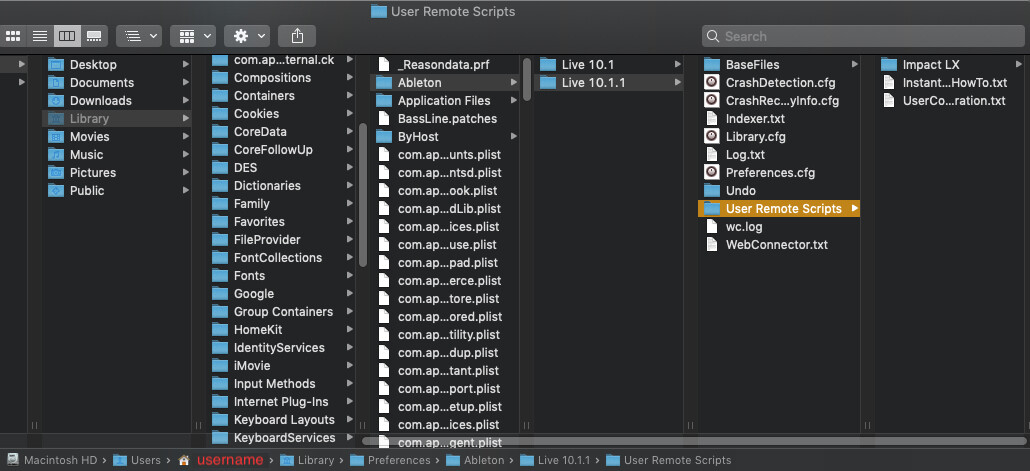
Image 2) OS X
Image 2) OS X
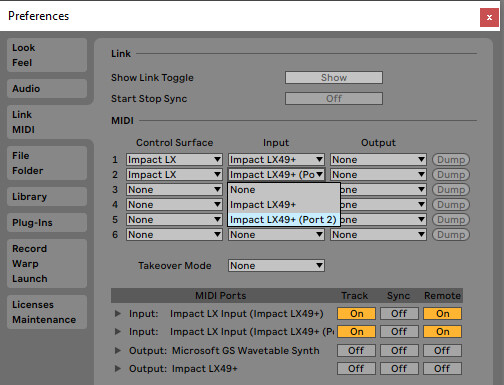
Image 3) Windows
Image 3) Windows
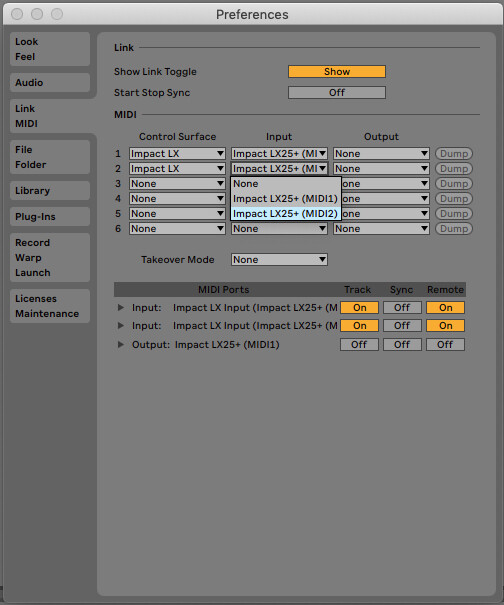
Image 4) OS X
Image 4) OS X
Features
With Preset Mode selected (press the ‘Preset’ button) and the Global Channel set to 16 (see instructions above) the pots, faders, pads and buttons on your Impact LX/LX+ will control the following parameters in Ableton Live (only the Transport functions apply to the Impact GX series):
Transport Buttons:
| Button | Function |
|---|---|
| Cycle | Activate/Deactivate loop markers in Arrangement View |
| << (Rewind) | Moves playback position backward |
| >> (Fast Forward) | Moves playback position forward |
| Stop | Stops playback |
| Play | Starts play back |
| Record | Activates Recording |
< Track & Track > Buttons:
- Selects the bank of controls for the active instrument
Faders:
- Faders 1-8 Control volume for the first 8 Mixer channels in the project.
- Fader 9 controls the Master Volume.
Fader Buttons:
- Buttons 1-8 arm the first 8 tracks in the project.
Knobs:
- Control Instrument parameters for the selected track.
Pad Maps:
- Pad Map1 triggers the first 8 drum pads in a selected bank for Live’s Drum Rack.
- Pad Map2 triggers the next 8 drum pads in a selected bank for Live’s Drum Rack.