Updating Firmware and Getting Started: Aura
When you first turn your Aura Beat Composer on, the display will show a message indicating that a firmware update is available. (Image 1).
The URL on the display will take you to the Nektar account creation page. If you have already registered an account, you can find the DAW support package files you need on your account page. This is the URL:
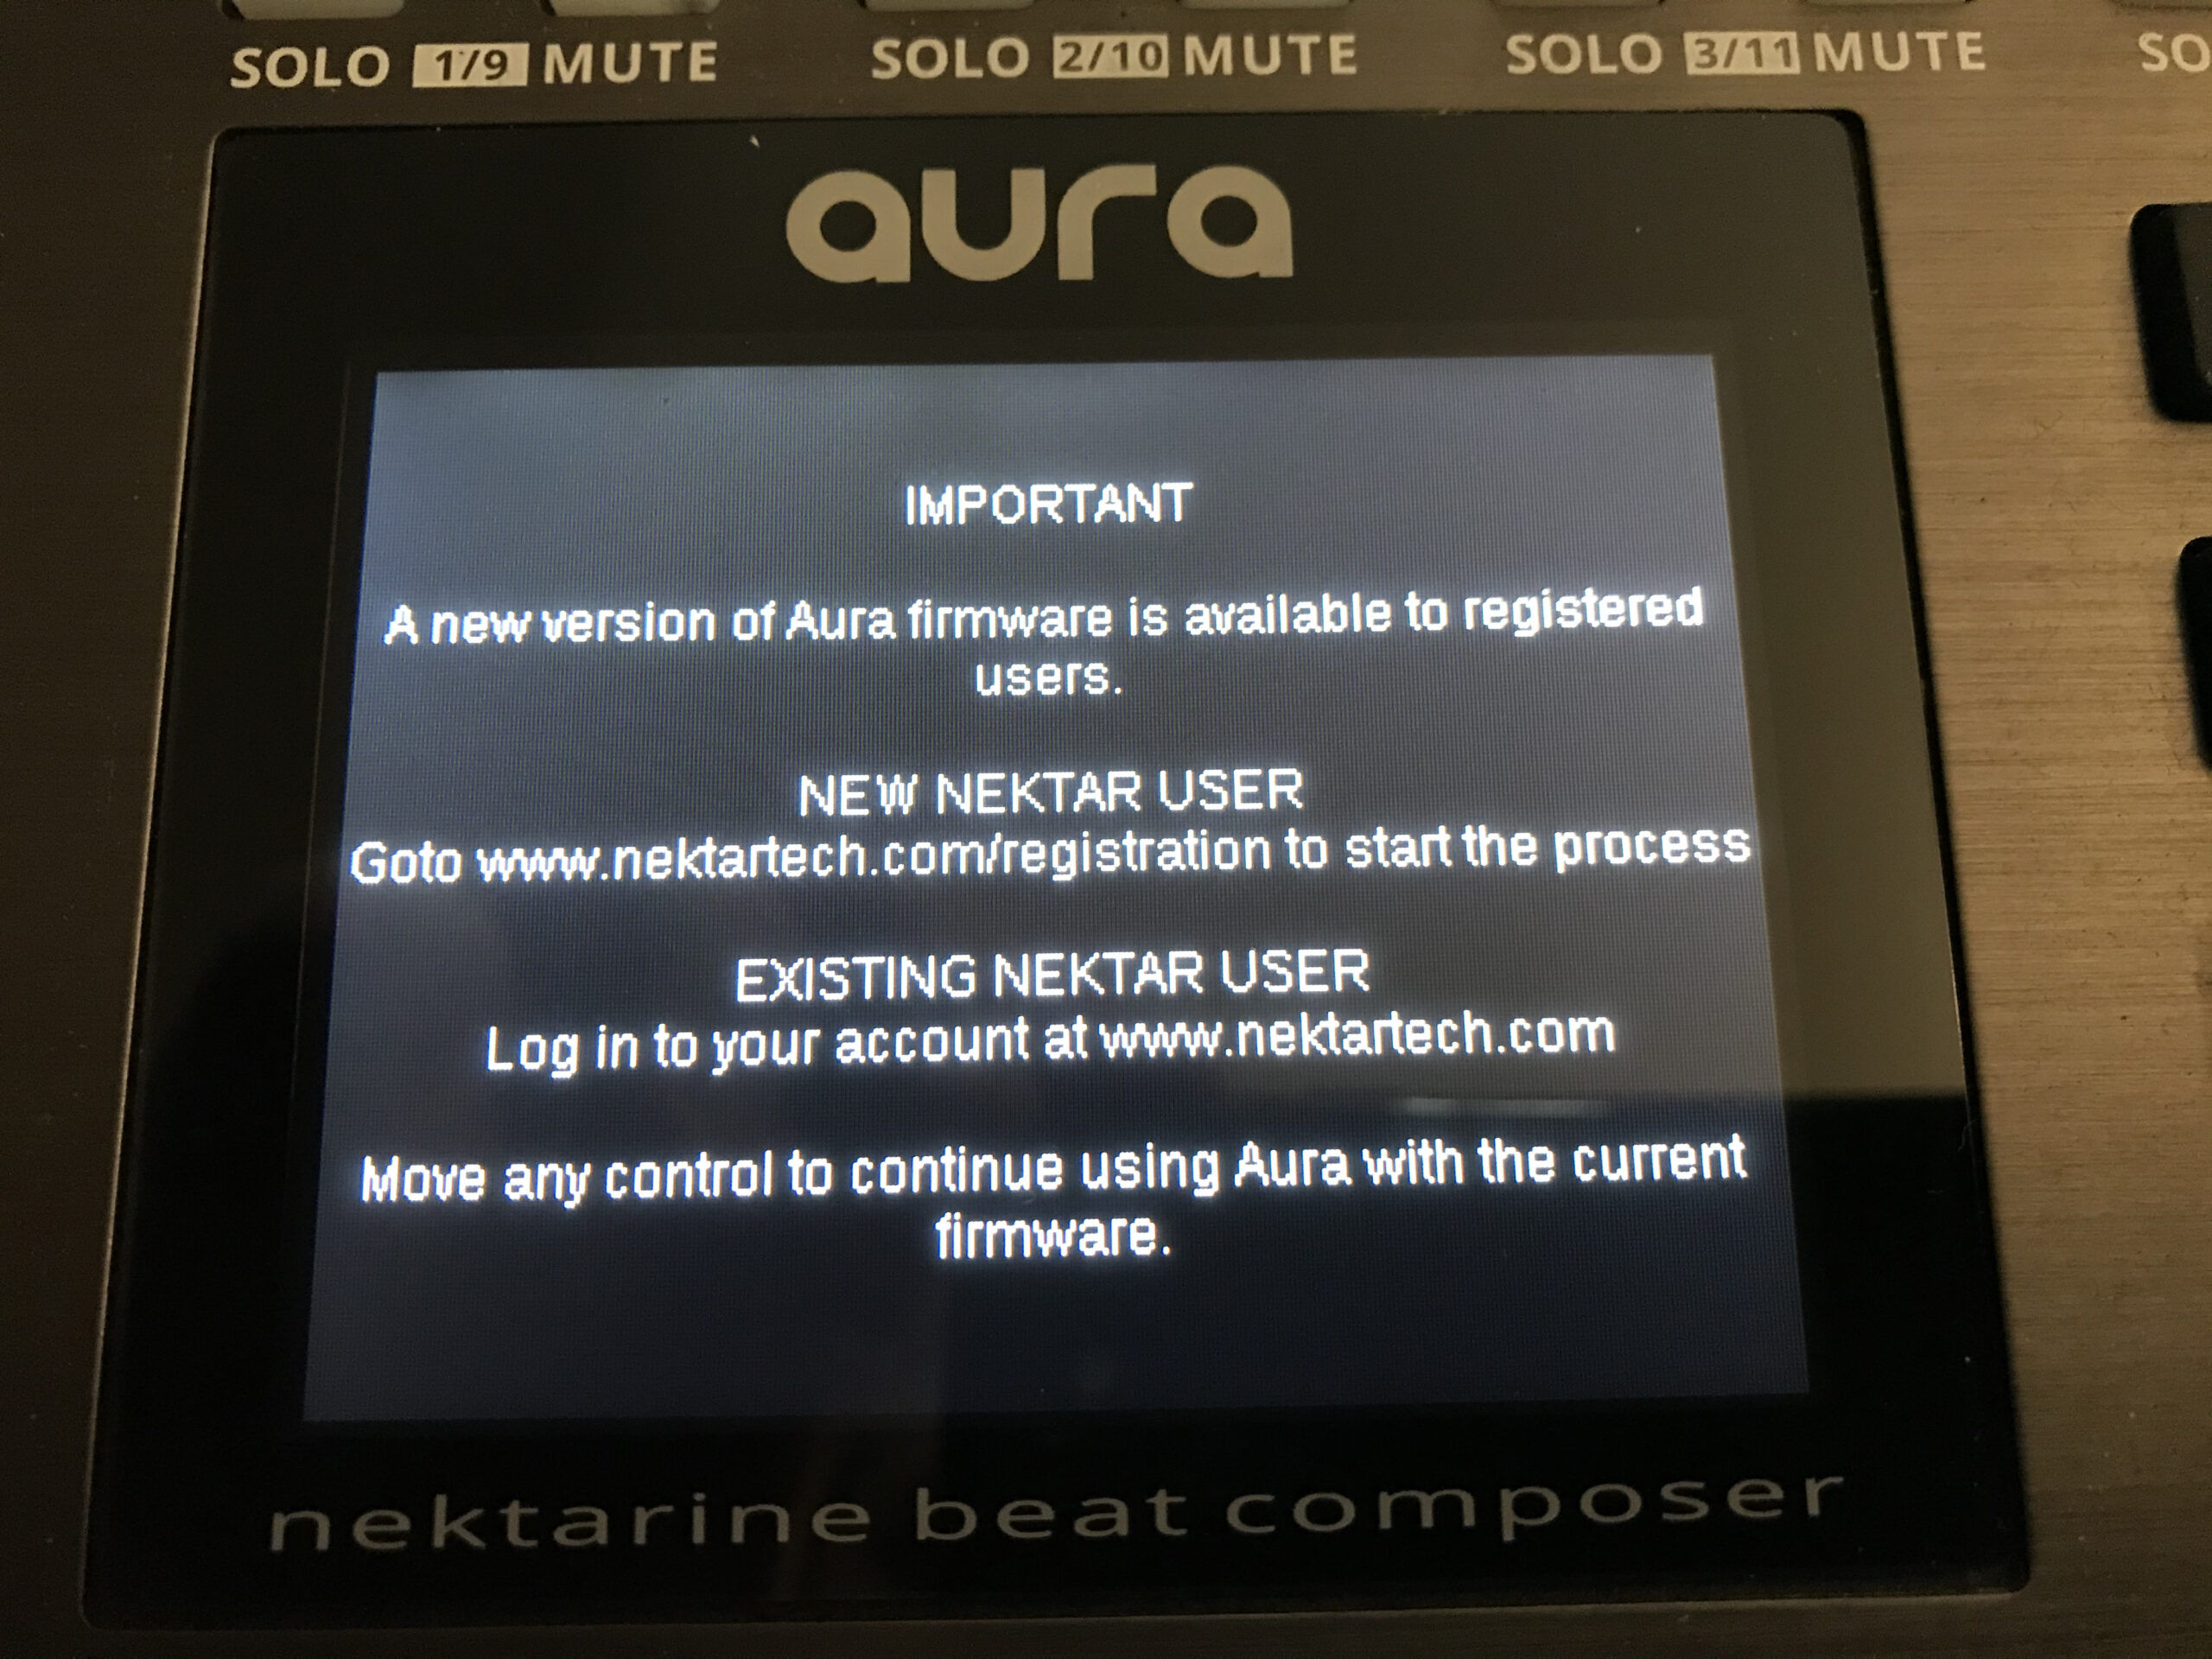
Image 1
Windows Instructions
Download the Aura_Firmware_WIN_v******.zip file (where ****** represents the firmware version number) from your Nektar account. This file contains the files needed to update your Nektar device’s operating system. Extract the file as shown in images 1 and 2.
- Start your controller in update mode. To do so, hold the [Internal] and [Shift] buttons when turning the controller on. (Image 3) The display will remind you to back up Aura’s settings, if you have saved changes to Sequencer collections or Internal mode presets. (Image 4)
- Press the bottom right display button to proceed with with update process. The display will now say ‘FW update mode’. (Image 5)
- Start nkupdate. You will find nkupdateTP1_v1.5.2.0.exe inside the NKupdate folder. (Image 6)
- The firmware update app nkupdate should now say “OK Nektar unit is connected in firmware update mode”. (Image 7)
- Press the ‘Load’ button in nkupdate. (Image 7)
- Find the file named ‘Aura_FW_….bin’. (Image 8)
- Select the firmware and click ‘Open’. The updater window will report “OK Correct firmware file loaded”. (Image 9)
- Click the ‘Program’ button to begin the update process. Once complete, you get the message “OK Programming and verification successful!” (Image 10)
- Close the firmware updater app.
If this is your first time updating the controller’s firmware, please restore the default settings.
- Turn the controller off power off.
Hold the [Internal] and [Click] buttons while turning the controller back on. - After a moment, a message will appear which indicates that the default settings are being restored.
- Release the [Internal] and [Click] buttons.
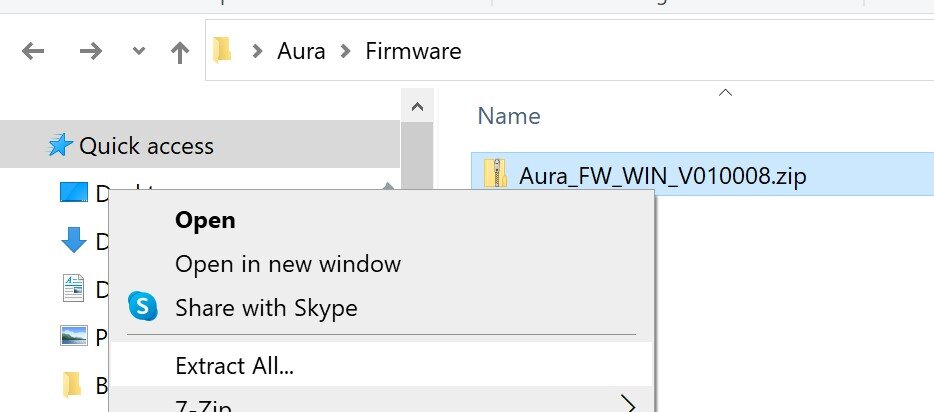
Image 1
Image 1
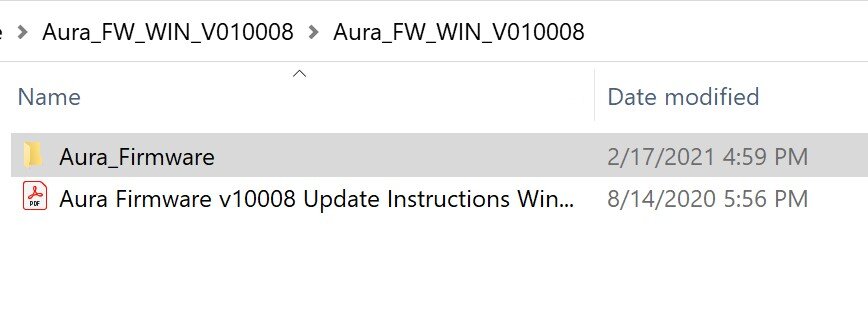
Image 2
Image 2
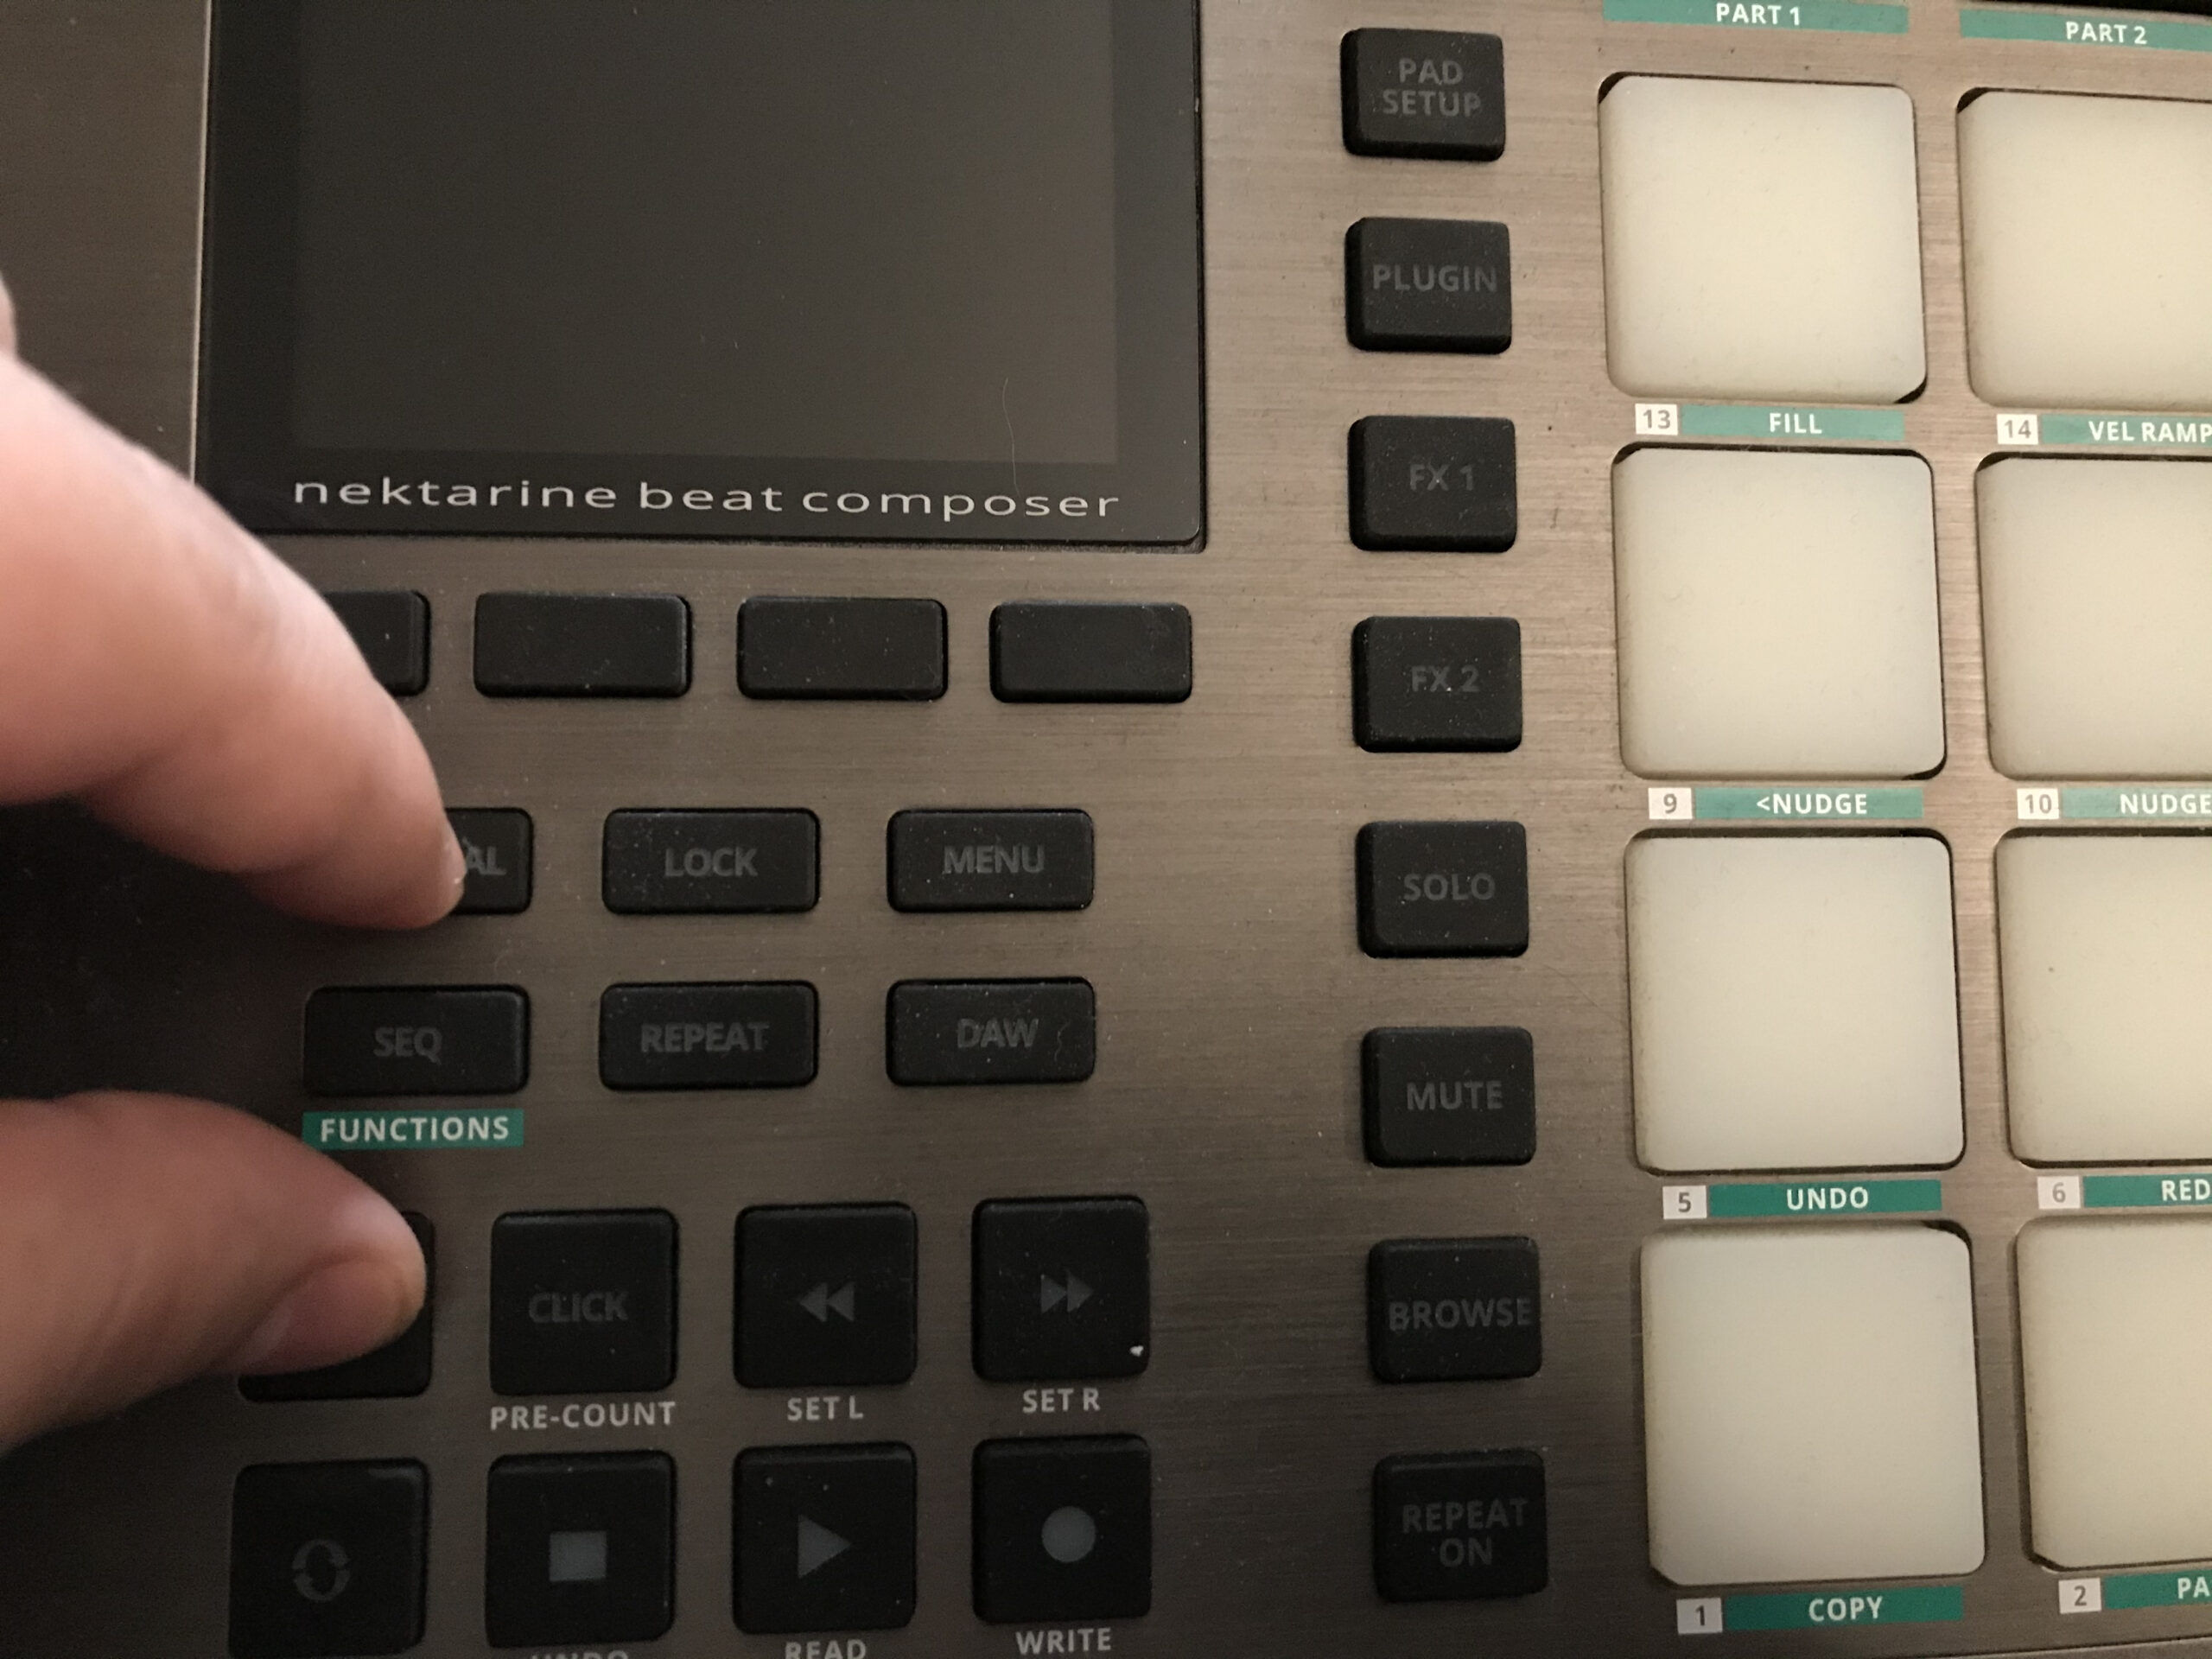
Image 3
Image 3
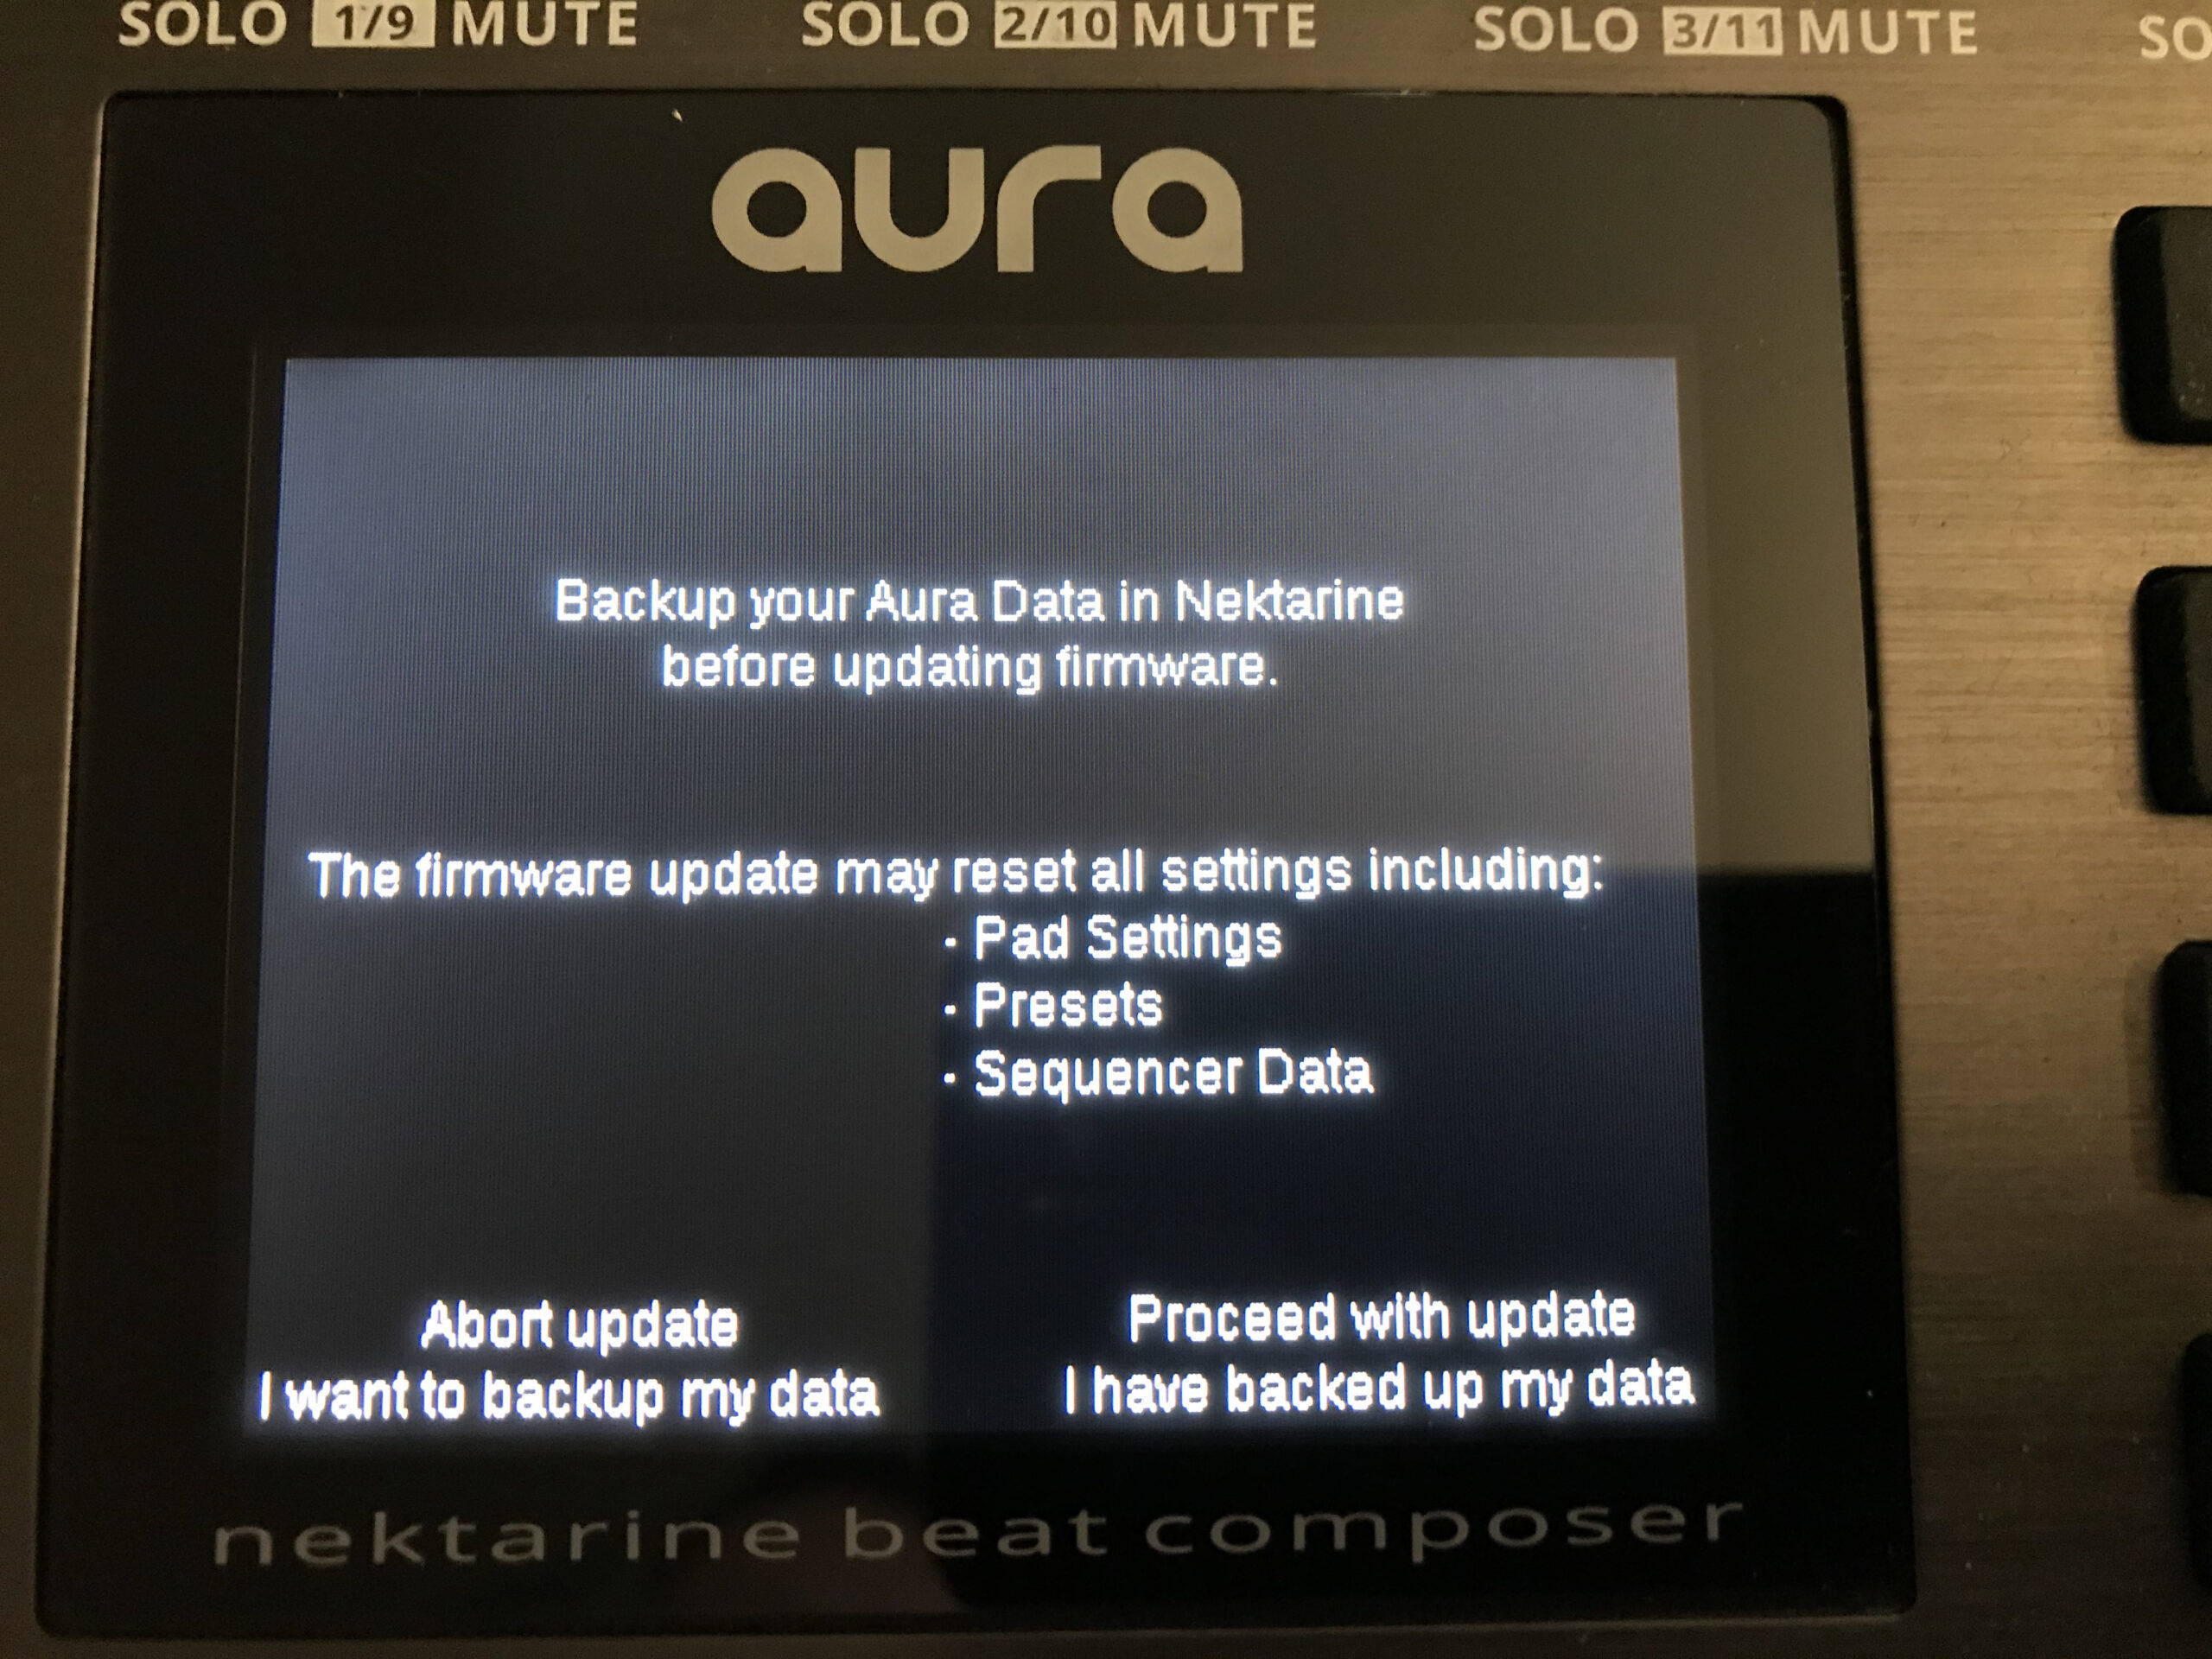
Image 4
Image 4
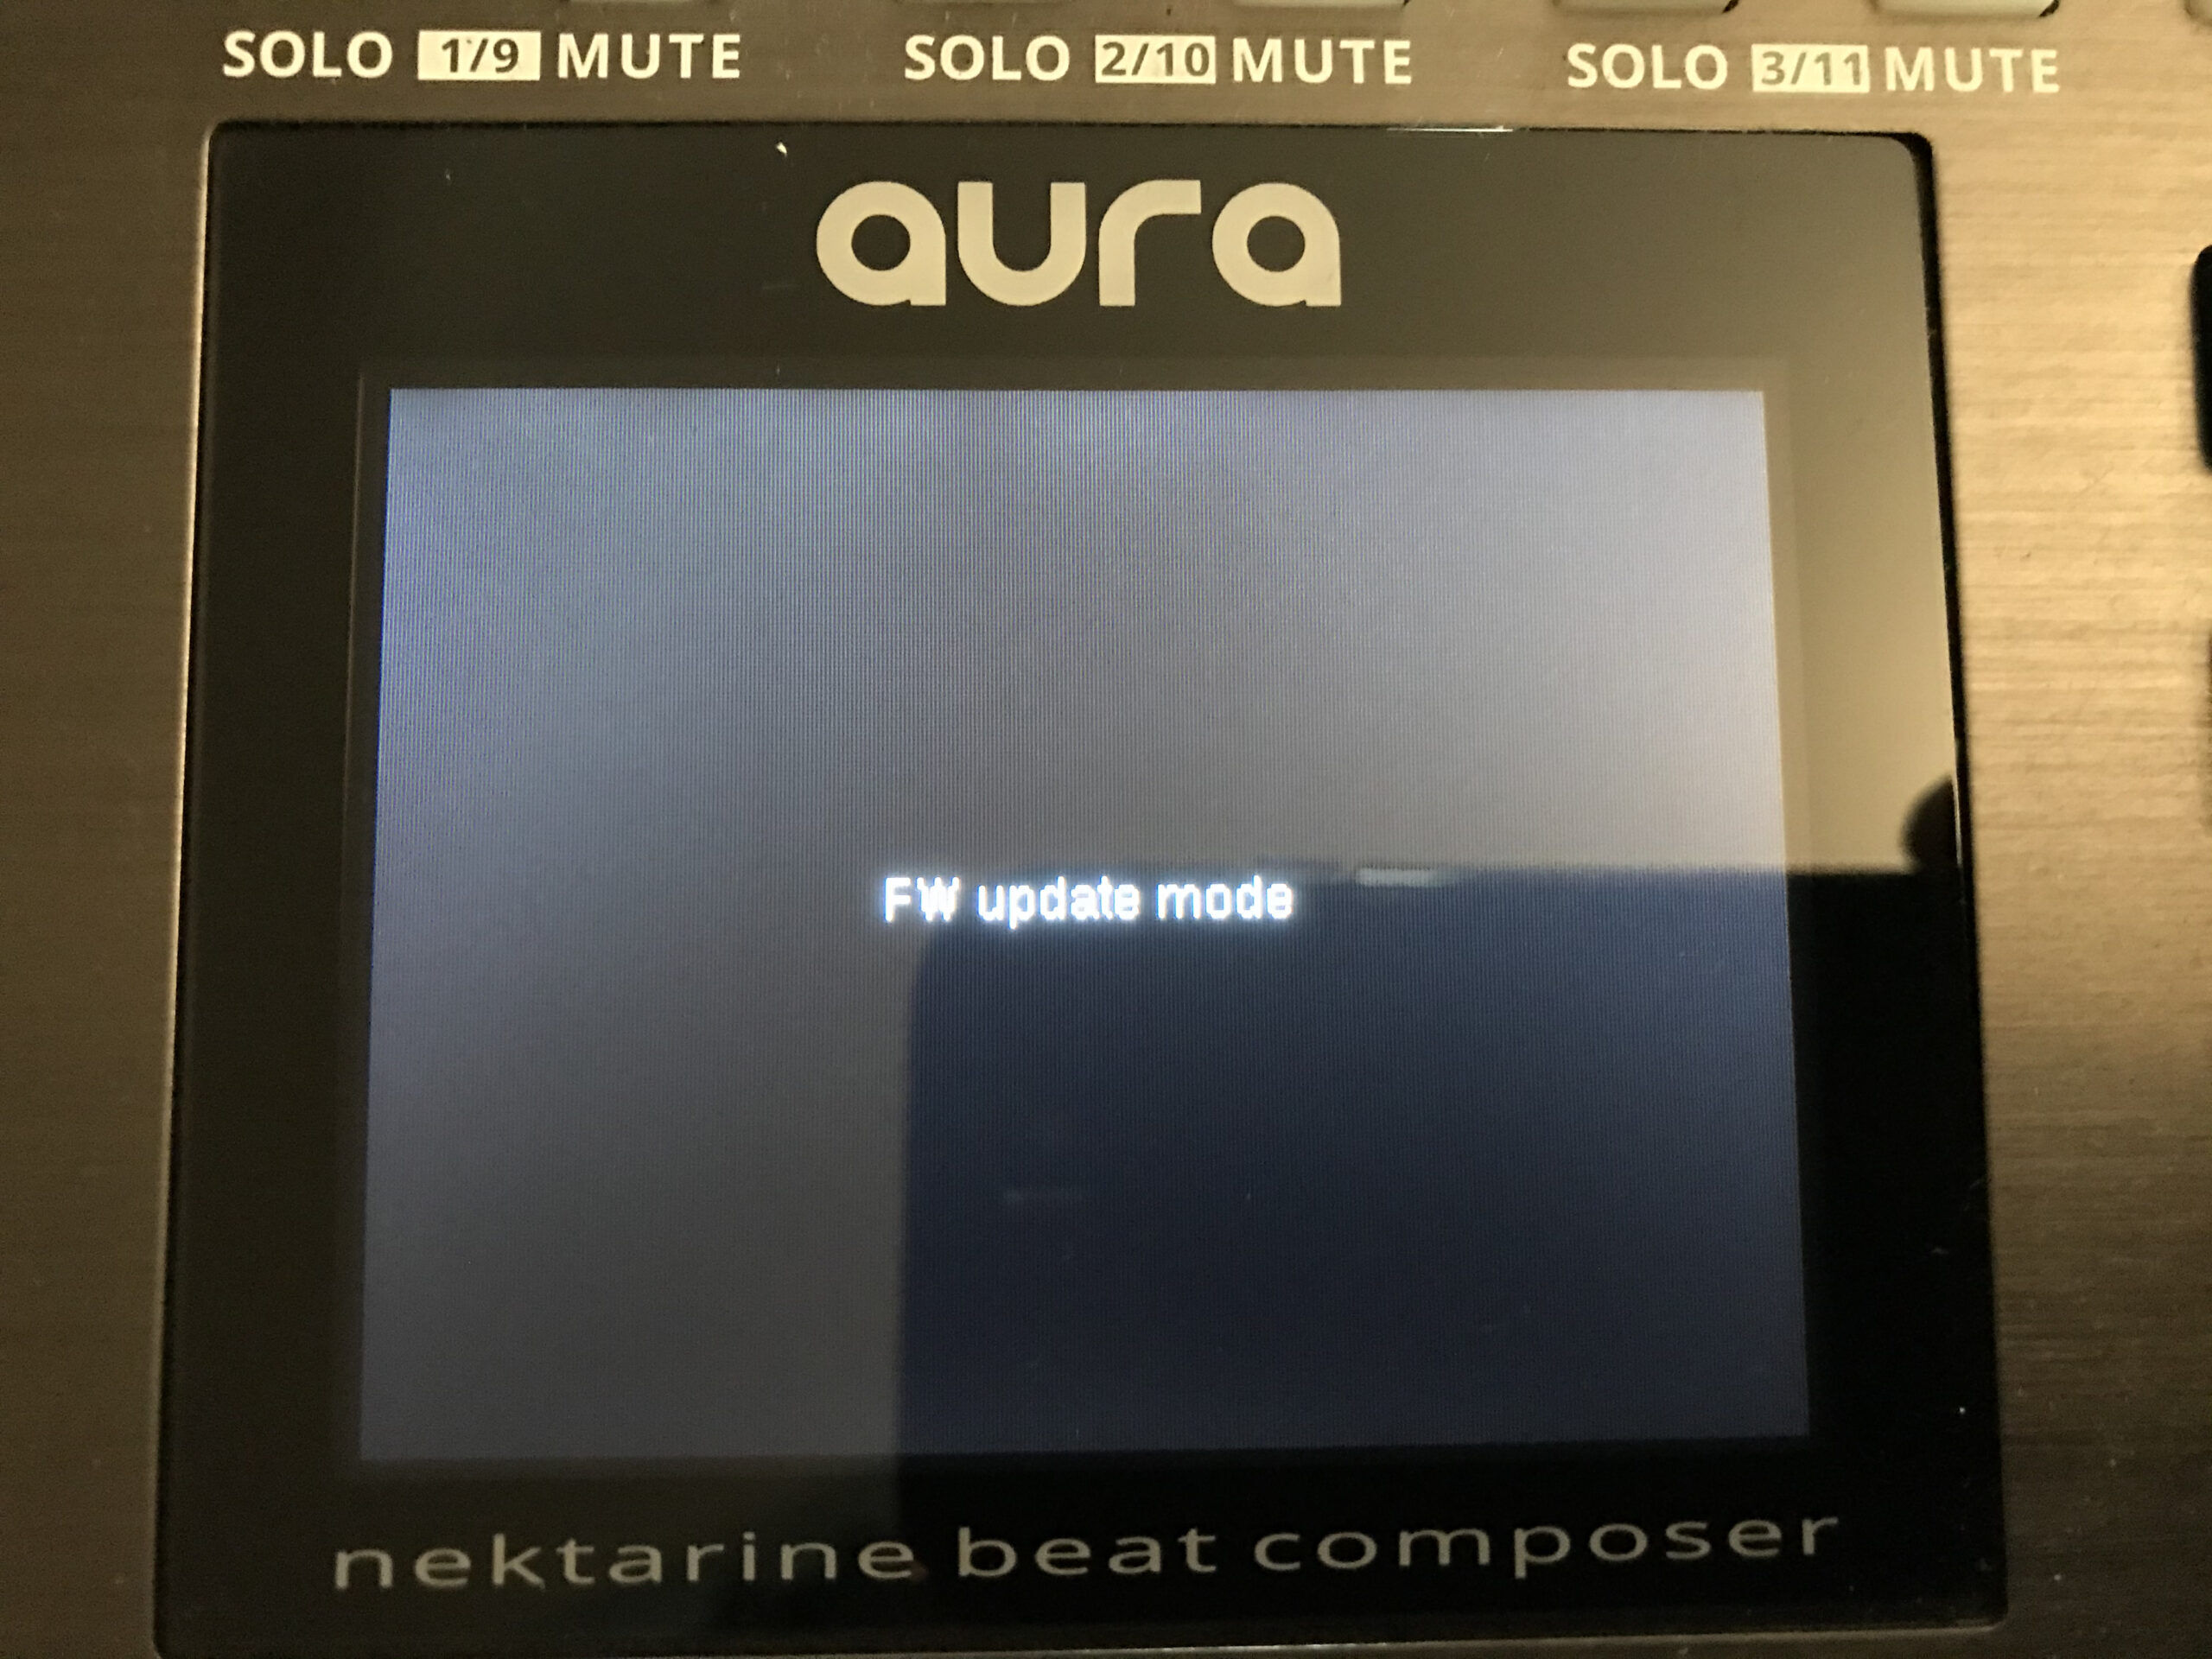
Image 5
Image 5
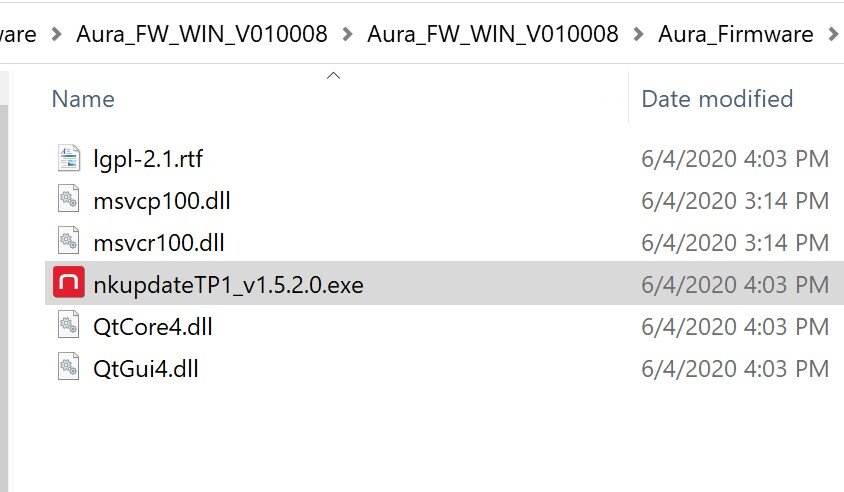
Image 6
Image 6
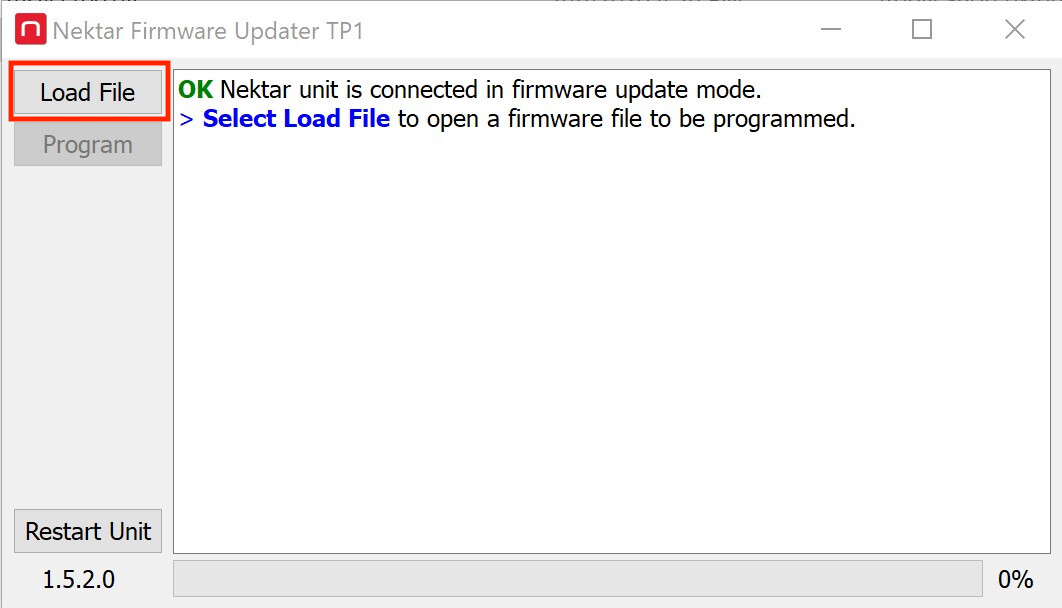
Image 7
Image 7

Image 8
Image 8

Image 9
Image 9
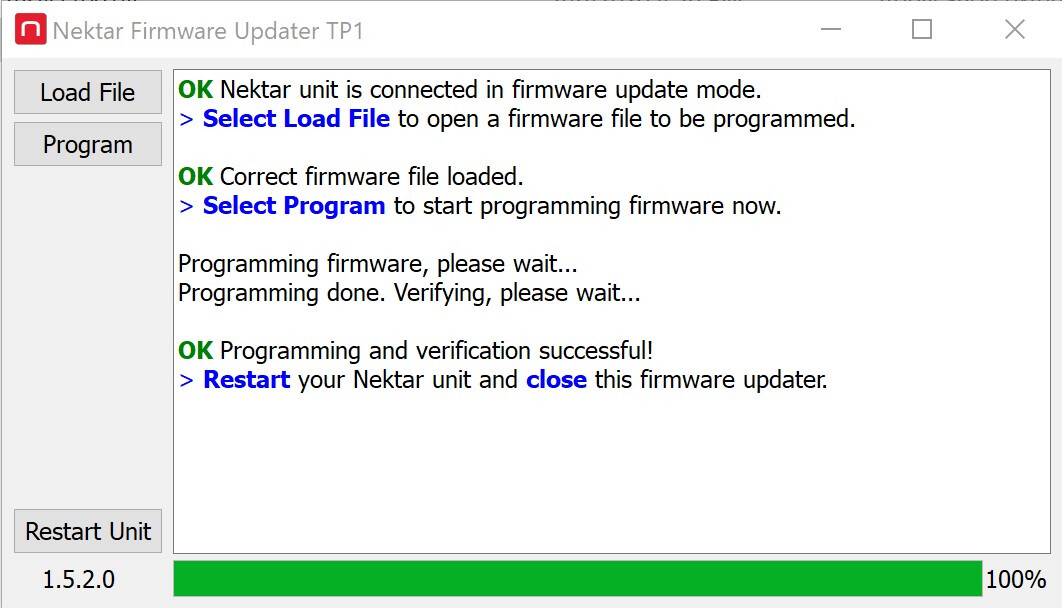
Image 10
Image 10
MacOS Instructions
Download the Aura_Firmware_MacOS_*****.zip file (where ****** represents the firmware version number) from your Nektar account. This file contains the files needed to update your Nektar device’s operating system. Open the .dmg as shown in images 1 and 2.
- Start Aura in update mode. To do so, hold the [Internal] and [Shift] buttons when turning the controller on. (Image 3) The display will remind you to back up Aura’s settings, if you have saved changes to Sequencer collections or Internal mode presets. (Image 4)
- Press the bottom right display button to proceed with with update process. The display will now say ‘FW update mode’. (Image 5)
- Start nkupdate.
- The firmware update app nkupdate should now say “OK Nektar unit is connected in firmware update mode”. (Image 6)
- Click the Load button in nkupdate. (Image 6)
- In the Finder window that appears you will see ’Aura_Fimrware’ listed under Locations, in the Side Bar. Select that, so you can see the firmware files. Find the file named ‘Aura_FW_….bin’. (Image 7)
- Select the firmware file and click ‘Open’. The updater window will report “OK Correct firmware file loaded”. (Image 8)
- Click ‘Program’ button to begin the update process. (Image 9) Once complete, you should get the message “OK Programming and verification successful!”. (Image 10)
- Close the firmware updater app.
If this is your first time updating the controller’s firmware, please restore the default settings.
- Turn the controller off.
- Hold the [Internal] and [Click] buttons while turning the controller back on.
- After a moment, a message will appear which indicates that the default settings are being restored.
- Release the [Internal] and [Click] buttons.

Image 1
Image 1
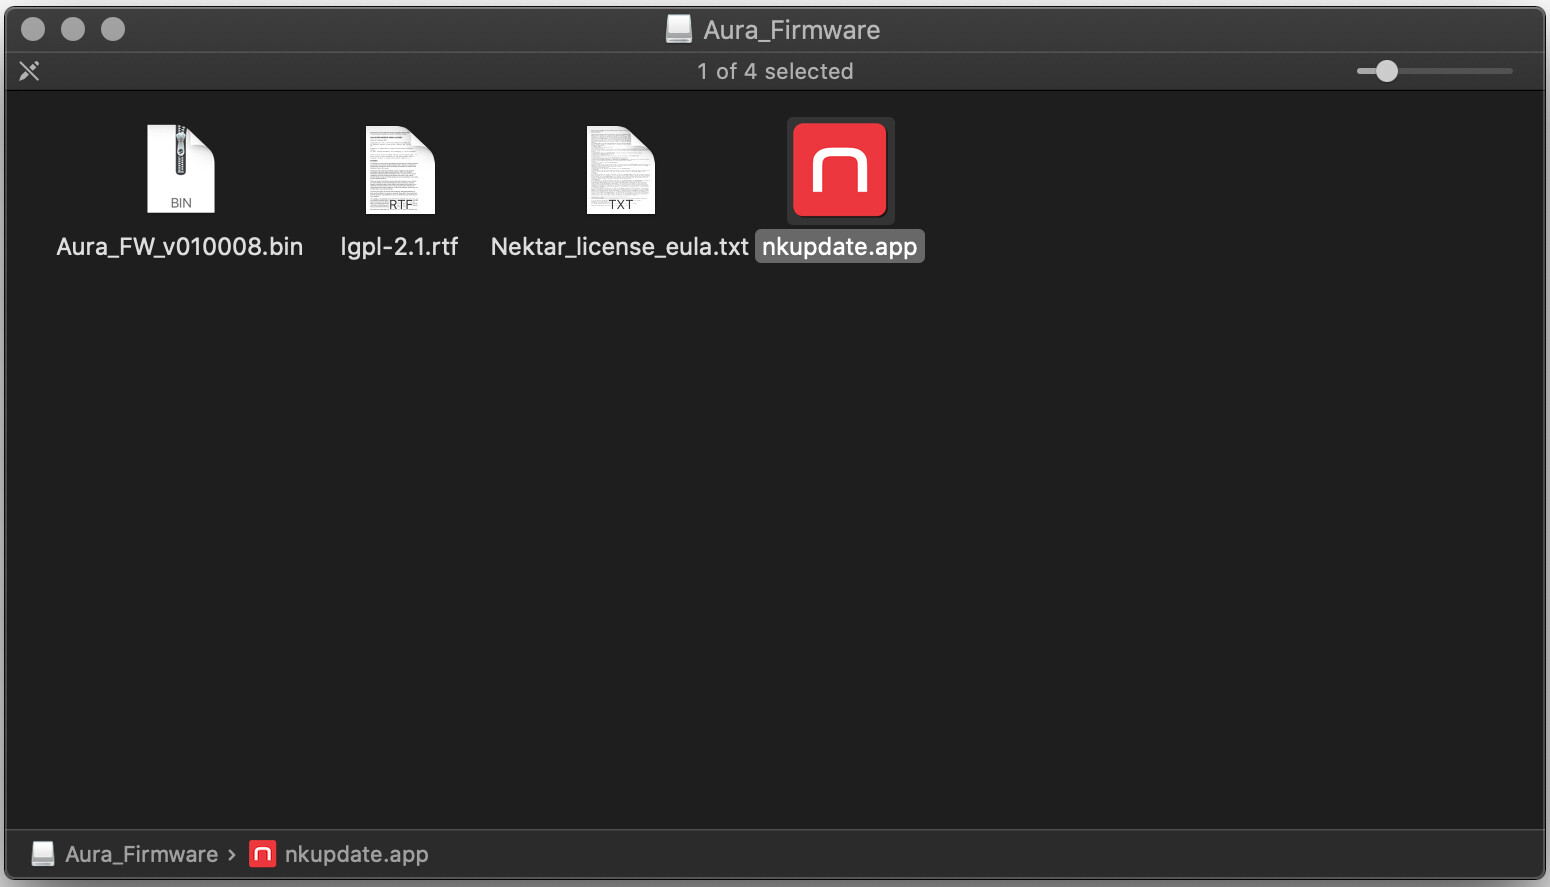
Image 2
Image 2
Image 3
Image 3
Image 4
Image 4
Image 5
Image 5

Image 6
Image 6
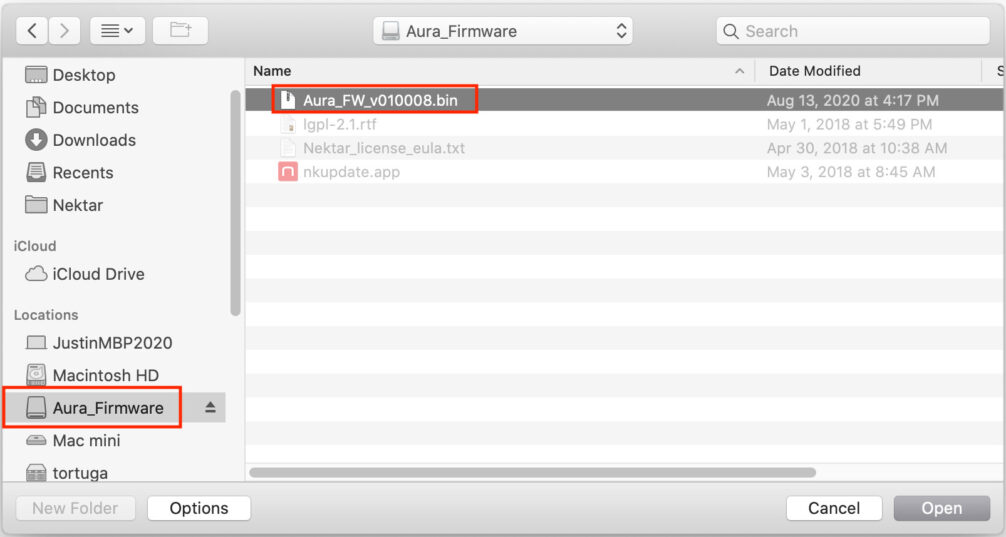
Image 7
Image 7
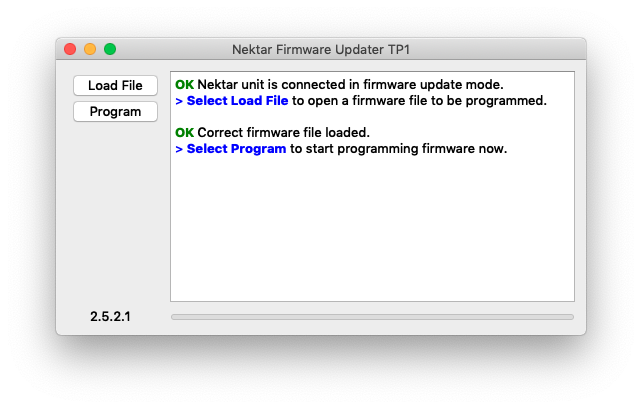
Image 8
Image 8
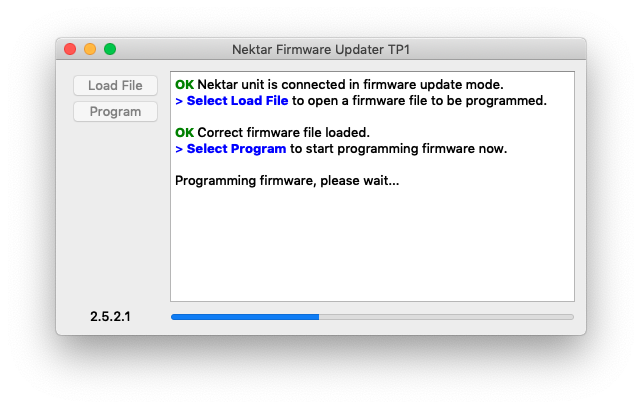
Image 9
Image 9
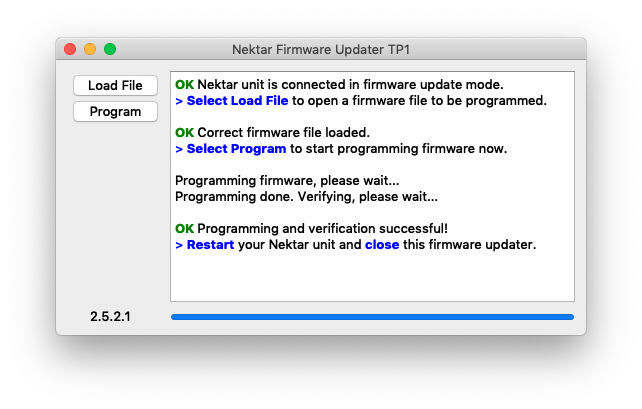
Image 10
Image 10
Troubleshooting
Check the current Firmware Version:
- Hold the [Internal] button and press [Menu].
- The About page will appear. The firmware version will be shown on this page.
The ‘Load’ button is greyed out:
- Quit nkupdate.
- Turn the controller OFF.
- Start the controller in update mode – as detailed in earlier instructions.
- Open nkupdate again.
Possible warnings and error messages:
“X Wrong firmware file for the connected Nektar product.”
Make sure you selected the correct firmware file, during the ‘Load’ process.