Reason ready – Ready for Reason
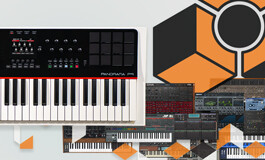
Panorama adds another dimension to Reason. With its super transparent workflow, you are able to work with all controllable sections without constantly having to reference your computer screen or reach for your mouse.
Simply select a menu and you have all available parameters automatically mapped and displayed clearly on Panorama’s TFT screen including parameter names and values.
Panorama is the closest you get to operating Reason, as if its hardware.

MODES OF REASON
Panorama’s Reason control is activated with the mode buttons. Here you can switch between Mixer, Instrument and Transport modes to control different parts of Reason. One button press completely reconfigure Panorama’s controls to focus on the selected mode. The 4th mode is Internal mode which takes you out of controlling Reason and allows you to use Panorama’s internal MIDI control options to, for example, control a ReWired host DAW.
DISPLAY AND NAVIGATION
MAKES SENSE OF IT ALL
Navigation and parameter feedback makes all the difference to logical workflow. With Panorama you are never lost because all the important information is always right there, on the display. Here is an overview of how Reason parameters and menus are displayed.

At the top, the info-line shows the parameter name and value for the control you are moving. The info-bar shows important navigational information such as Track name, Mixer Channel number and Device name. Here is where you find the assignments for the menu you have selected. The menu’s at the bottom shows what each of the 5 soft-key buttons below the display do.
FINDING YOUR WAY
Panorama’s navigation buttons are logically laid out and easy to get to. First there are 5 soft-key buttons under the display with functions that update depending on what menu you are in. The display tells you at any time either what parameter they control or what menu they will navigate to.

The 6 navigation buttons below, lets you step through the Reason sequencers tracks which in turn can change what mixer channel the auto fader is controlling or what device is controlled in Instrument mode. The Patch -/+ buttons change the patch of the current device with an added bonus in Instrument mode where the Data Control can also be used to fast scroll through device patches.
The view button changes what you see on your computer display with the mixer appearing in Mixer mode, the rack in Instrument mode and the sequencer appearing in Transport mode.
Using the Shift button additional functionality allows you to bank over blocks of 8 channels in Mixer mode so you can change assignments of the fader group from say ch 1-8 to ch 9-16. And when you are working in the sequencer environment you can use the zoom buttons to zoom in and out of elements.
CONTROLLING THE MIXER
IS LIKE OPERATING A MIXER
With its compact user interface and tactile control, Panorama gets to parameters so fast that it beats the mouse in many situations.
You can control 8 channels at a time with the first 8 faders operates channel volume with the Bank> and Bank< navigating 8 channels forward or back. The 8 encoders above the faders control pan by default. Pressing the toggle button to the right of the encoders, change their assignments to any of the sends 1-8.
The LED buttons below the faders can control solo or mute for the current block of 8 channels. A third option configures the buttons as Select buttons. A selected channel has access to the entire channel strip parameters.

CHANNEL STRIP CONTROL
The 8 encoders to the right of the display controls EQ parameters by default and the rest of the channel strip parameters through the soft-key menus at the bottom of the display.
Change the sequencer track and the channel strip follows but if you want to tweak the EQ on the kick drum track while continuing to play the bass line on your current sequencer track, just use the LED buttons for selecting the kick drum mixer channel and dial in the EQ.
E+Q=COMPLETE EQ
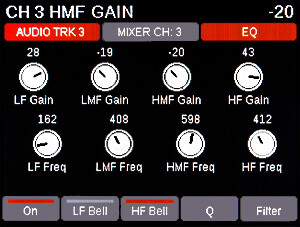
Pressing the ‘EQ’ display button updates the screen to show the assignments of the 8 encoders to the right of the display. The main EQ section is laid out so all 4 main bands are accessible – gain and frequency can be adjusted easily. Two display buttons allow you to switch HF and LF Bell on and off whilst the first menu button toggles the EQ on and off.
The Q button changes the assignments of two encoders so you now can adjust Q for the 2 mid bands. Pressing that button one more time will take the view back to the previous view.
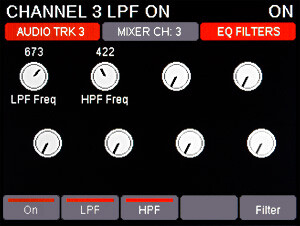
The ‘filter’ menu button shows the Lo and Hi Filter parameters giving you complete control of all 6 bands.
YYou can get back to the main mixer view at any time by pressing the illuminated Mixer button above the display. Although the EQ page is in the display, the rest of the controls in the fader section continue to operate as described in part 1.
DYNAMICS, INSERTS & SENDS
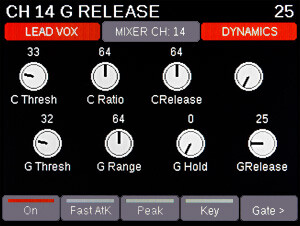
From the mixer home page you access the menus for dynamics, inserts and sends. Pressing the soft-key button for the Dynamics menu gain access to Compression and Gate in the Reason channel strip. With the display buttons compression and gate can now be switched on and off along with the Key button for side-chaining.
Back at the main mixer menu, the ‘Inserts’ menu button gains access to the 4 insert rotaries. You can also scroll through the various insert patches with the 5th encoder. Insert buttons 1-4 are mapped across the menu buttons, as well as ‘bypass’.
The ‘Sends’ menu button gains access to… FX1-8 sends! Earlier we described how to control sends during multi-channel mixing but a channel strip would not be complete without the ability to control all 8 sends at the same time. The menu buttons allow you to select between FX1-8 levels, on/off toggle and pre-fader toggle.
REASON PRO-CONSOLE CONTROL
The touch sensitive motorized fader is part of the channel strip. When you change sequencer track the fader therefore moves as channel volume changes from channel to channel. You can then move the fader to change volume setting or record automation. The two LED buttons follow the assignment of the motorized fader controlling Solo and Mute. You can even lock the motorized fader to a specific channel, master volume or control room. Whether you are in Transport, Mixer or Instrument mode, the motorized fader continues to give you pro-console channel control.

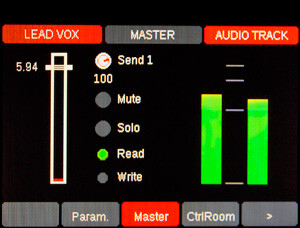
VU-style metering adds color and movement to the fader page.
And it tells you if your signal is clipping!
CREATE INSTRUMENT DEVICES
DIRECTLY FROM PANORAMA
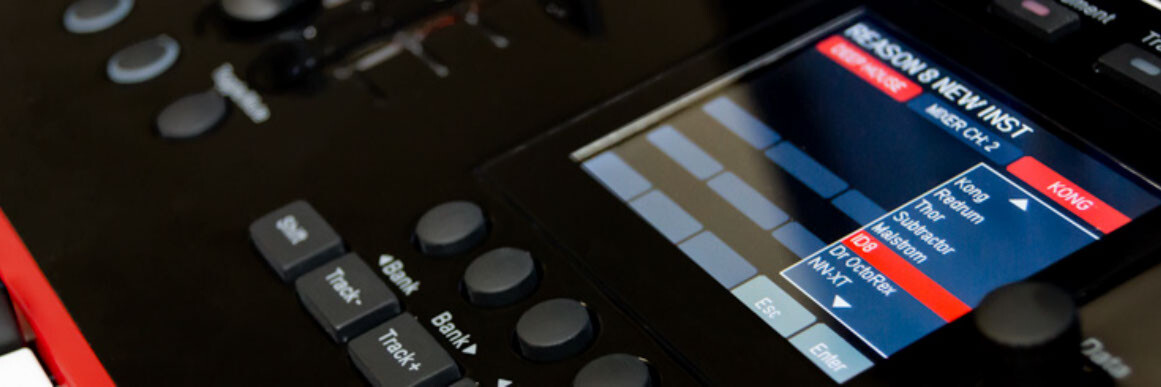
With Reason 8, building a song directly from Panorama is a reality. Start with an idea, create the instruments you need and build up your track. It’s that simple.
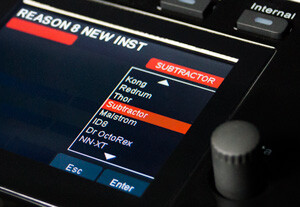
The default instrument devices are neatly selectable from a Panorama popup menu window. Press the Panorama enter button and you are well on the way. Rack Extensions can be created in the same manner using your computer screen as a reference point.
THE REASON DEVICES YOU LOVE
WITH TACTILE CONTROL OF YOUR DREAMS
Panorama’s Instrument mode is a dream come true. Every controllable parameter on every device, are mapped out logically so you don’t have to.
Each device is presented in a home page that resembles a workstation environment.
Scroll through presets using the Data Control or Patch -/+ buttons or tweak the macro parameters assigned to the 8 encoders to the right of the display. Faders are by default assigned to envelopes (amp and filter on most devices).
Controlling other parts of a device is easily done using the pop-up menu button. Let’s take a look at an example to see how it all works.
AT HOME WITH THOR
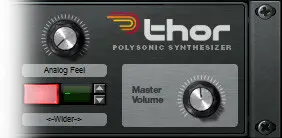
The mighty Thor is the largest and most comprehensive device in Reason and therefore illustrates perfectly how deep Panorama’s Reason implementation is. Every single controllable parameter is mapped out from oscillators letting you change type to the modulation matrix and sequencer.
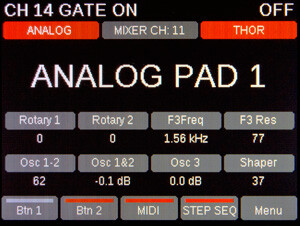
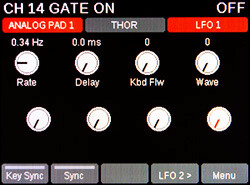
The instrument home page display the status for the rotary and button macro controls as well as the most useful filter and oscillator parameters so you can tweak sounds without having to navigate deep in menus. The info-line displays the track name (Analog), the mixer channel the track device is routed to (Ch 14) and finally the device on the track (Thor). As you select different sections of Thor to control, the info-bar updates to show you where you are at all times.
POP-UP THE MENU
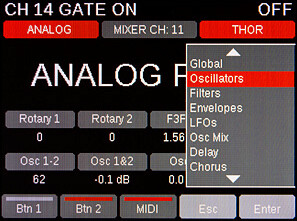
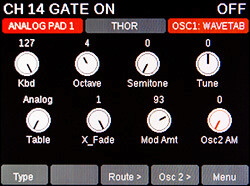
Pressing the menu button takes you deeper into Thor via a pop-up menu list so you can select exactly the area of Thor you want to work with. If, for example, Oscillators are selected, you will have access to all parameters related to Oscillator 1 and the option to toggle to Oscillator 2 and 3.
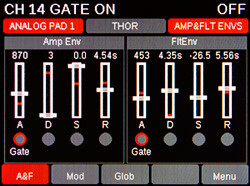
The faders are still assigned to control Amp and Filter envelopes but if you want to see the status, you just select Envelopes from the pop-up menu. The right hand encoders remain assigned to the menu you operated most recently.
Selecting LFOs works the same way with the parameters assigned for each LFO programmable by the 8 encoders and the ability to toggle to the next LFO. Notice that the right red Info-bar field display what menu you are in currently. It really is hard to get lost.
BEATS & PERCUSSION
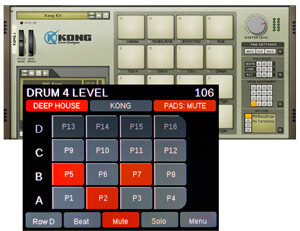
Percussion and loop devices such as Kong, Dr Octorex and ReDrum work in a similar but here percussion sounds or rex slices are automatically mapped out over the pads. Just start playing, there is no setup. The menus use the pads extensively to mute, solo or select patters where appropriate and you still have access to all the programmable sections like you do with any other device.
EFFECT CONTROL
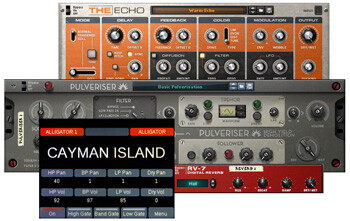
Panorama can also control any of the many effects in Reason, and there are no less than 3 setup options. First option is to create a track to route the mapping. For effects with presets, this is simply done by using a qwerty macro to create both effect and track with one button push. Now you can add effects and control them as you go without any interruptions.
You can also configure Panorama to take advantage of the Reason “Lock” feature which means you can lock Panorama Instrument mode to an effect while playing the device it’s processing, via a sequencer track.
The third option is to use remote override to setup your own permanent controls of an effect within any song. Panorama’s entire section of 8 encoders, 9 faders and 8 LED buttons have been kept free for this purpose in Transport mode. In fact any controllable parameter within Reason can be assigned to these controls so if you want to have access to parameters for two or more devices at the same time and within easy reach, use the transport mode for your customization.

RACK EXTENSIONS
Panorama supports Rack Extensions with the same logical workflow as all the Reason devices.
Regular Panorama updates keeps your setup up to date* so all you need to do is download the RE you want and start working.
The list of RE’s is extensive with more than 130 RE’s already mapped. Curious which RE’s are supported right now. View the list here.
VST INSTRUMENTS
With Reason 9.5, you can now also load VST instruments into Reason. So we premapped over 100 of the most popular instruments for you. Curious what VST instruments are supported? View the list here.
