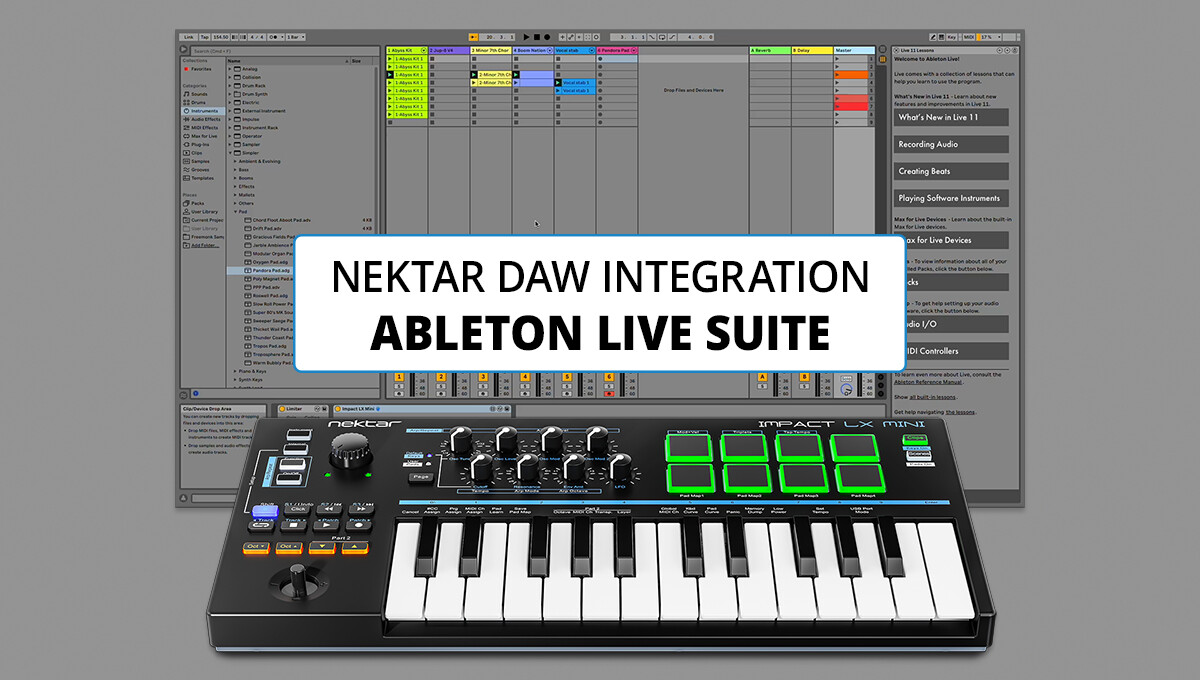
Nektar Impact LX Mini includes DAW Integration software for Ableton Live and Live Suite. In this video tutorial we’ll cover the advanced integration with Live Suite 11.
Two levels of integration are available: A Remote Script supporting all current versions of Ableton Live – and a Max4Live plugin that, as the name suggests, requires Max4Live which is only included with Ableton Live Suite.
In this tutorial video series, we are covering the setup and features of the Max4Live integration in a workflow context. So please also have the PDF manual that came with your download at hand for reference.
LX MINI SETUP
Let’s get set up first: Please log into your Nektar user account, register and download the Ableton Live integration files. The installer includes the integration files and a PDF manual detailing installation steps and the DAW integration features. And don’t forget to also update your LX Mini firmware before continuing, so you can take advantage of the latest features.
The DAW integration Remote Script works with all versions of Live and lets you control 21 DAW functions from LX Mini’s transport buttons: Features include extended transport control, track selection and project navigation as well as opening windows and volume control for the selected track and master. This integration is active after installation and MIDI port setup in Ableton (which we are showing in the video).
Advanced integration requires Max4Live and is enabled by inserting the LX Mini Max4Live plugin on Ableton’s master track. You require Ableton Suite version 11 or later for this integration to work. Features include browsing, powerful pre-mapped control for Ableton Live devices, 3rd party VST/AU plugin control and mapping, Record settings options and working with Clips & Scenes from LX Mini. For the complete DAW control experience as shown in the following videos, both levels of DAW integration must be active.
1. LIVE SUITE 11 INTEGRATION – OVERVIEW
In this video we are showing you the basic workflow and some of the DAW integration’s key features. The integration is activated by inserting the Max4Live plugin on your master track, so it makes sense to save it into your Live Default set. Please note: The integration requires Ableton Live Suite 11 or later to work. Should you be on an earlier version, please update first!
In this chapter we are focussing on the auto-mapped macro controls, transport and track volume control – and of course the pre-mapped control of Ableton devices. We are also showing how to create maps for Ableton and VST/AU plugins and how to navigate Ableton’s Browser.
2. RECORDING CLIPS
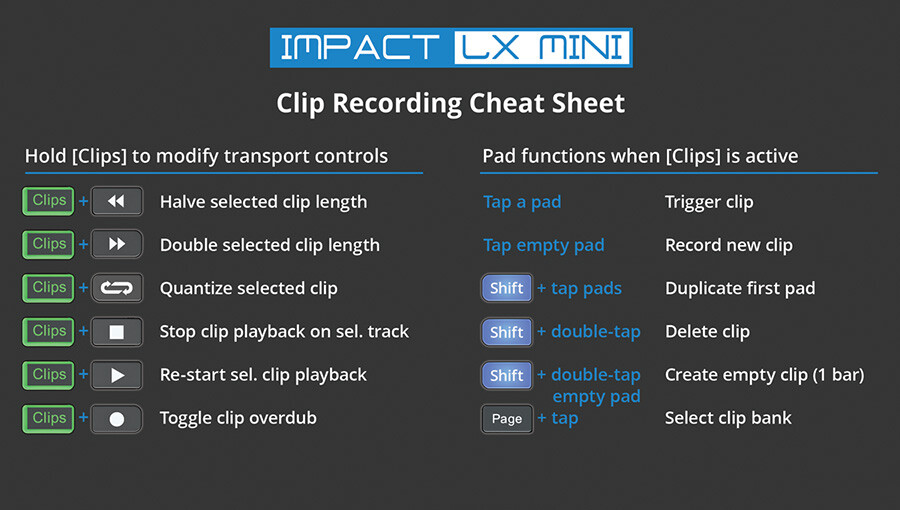
With LX Mini you can also record and tweak Ableton Clips: Clip creation, editing, overdubbing, quantization and trimming can all be triggered and controlled from the hardware. In this chapter we are covering the workflow, how to access and control these features directly from the pads using LX Mini’s Clips mode.
Tip: You can download the sheet with all Clips shortcuts at the bottom of this page.
3. USING SCENES
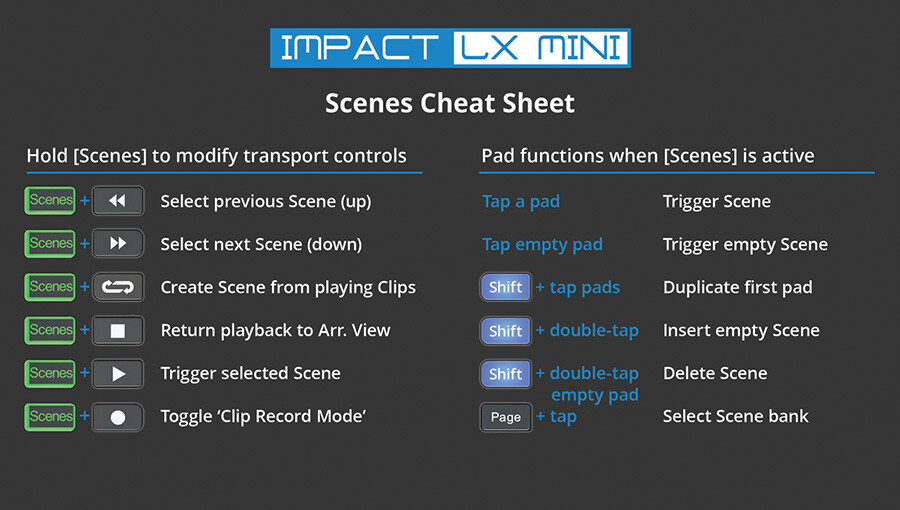
This chapter covers how to create a track structure and record it straight into Ableton by using LX Mini’s Scenes mode: Create, select and trigger Scenes, tweak Clips and record an Arrangement, all controlled from the hardware. The workflow includes switching Arrange and Session view, and moving seamlessly between Clips and Scenes modes.
Tip: You can download the sheet with all Scenes shortcuts at the bottom of this page.
ADDITIONAL RESOURCES
As mentioned above, make sure that you have the DAW integration manual PDF at hand. It includes a step-by-step guide through the installation steps and a useful graphic with all of the transport button shortcuts. in the following, we’ll also provide you with the “cheat-sheets” for Clips and Scenes: simply click on the images to download in hi-rez!
CLIPS MODE SHORTCUTS
This charts gives you an overview of the Clip mode shortcuts. Click on image to open in hi-rez.


